Connect Claude, Cursor, Codex, and ChatGPT via MCP
MCP (Model Context Protocol) lets AI tools like Claude, Cursor, and Codex securely work with your Nexly account directly inside the chat or editor. They can read your analytics — traffic, reports, funnels, and property details — and, if you allow it, add a new app to Nexly, install tracking in your project, configure custom events and funnels, filter out unwanted traffic, invite teammates, and share public links.
Nexly exposes a hosted MCP server. There is nothing to install and no tokens to copy: you connect with OAuth and authorize access with your Nexly account, the same way you would sign in with Google. The authorization page lists exactly what the tool will be able to do. Connected tools can never delete an app, rotate keys, grant admin access, or touch billing.
https://api.nexly.to/mcp
The MCP server accepts OAuth connections only. Personal API tokens (nxp_…) are for the read API and do not work with MCP.
Connect Nexly to Claude
You'll need the Claude Desktop app (or claude.ai) and a Nexly account. The setup takes about two minutes.
Step 1: Open Claude settings
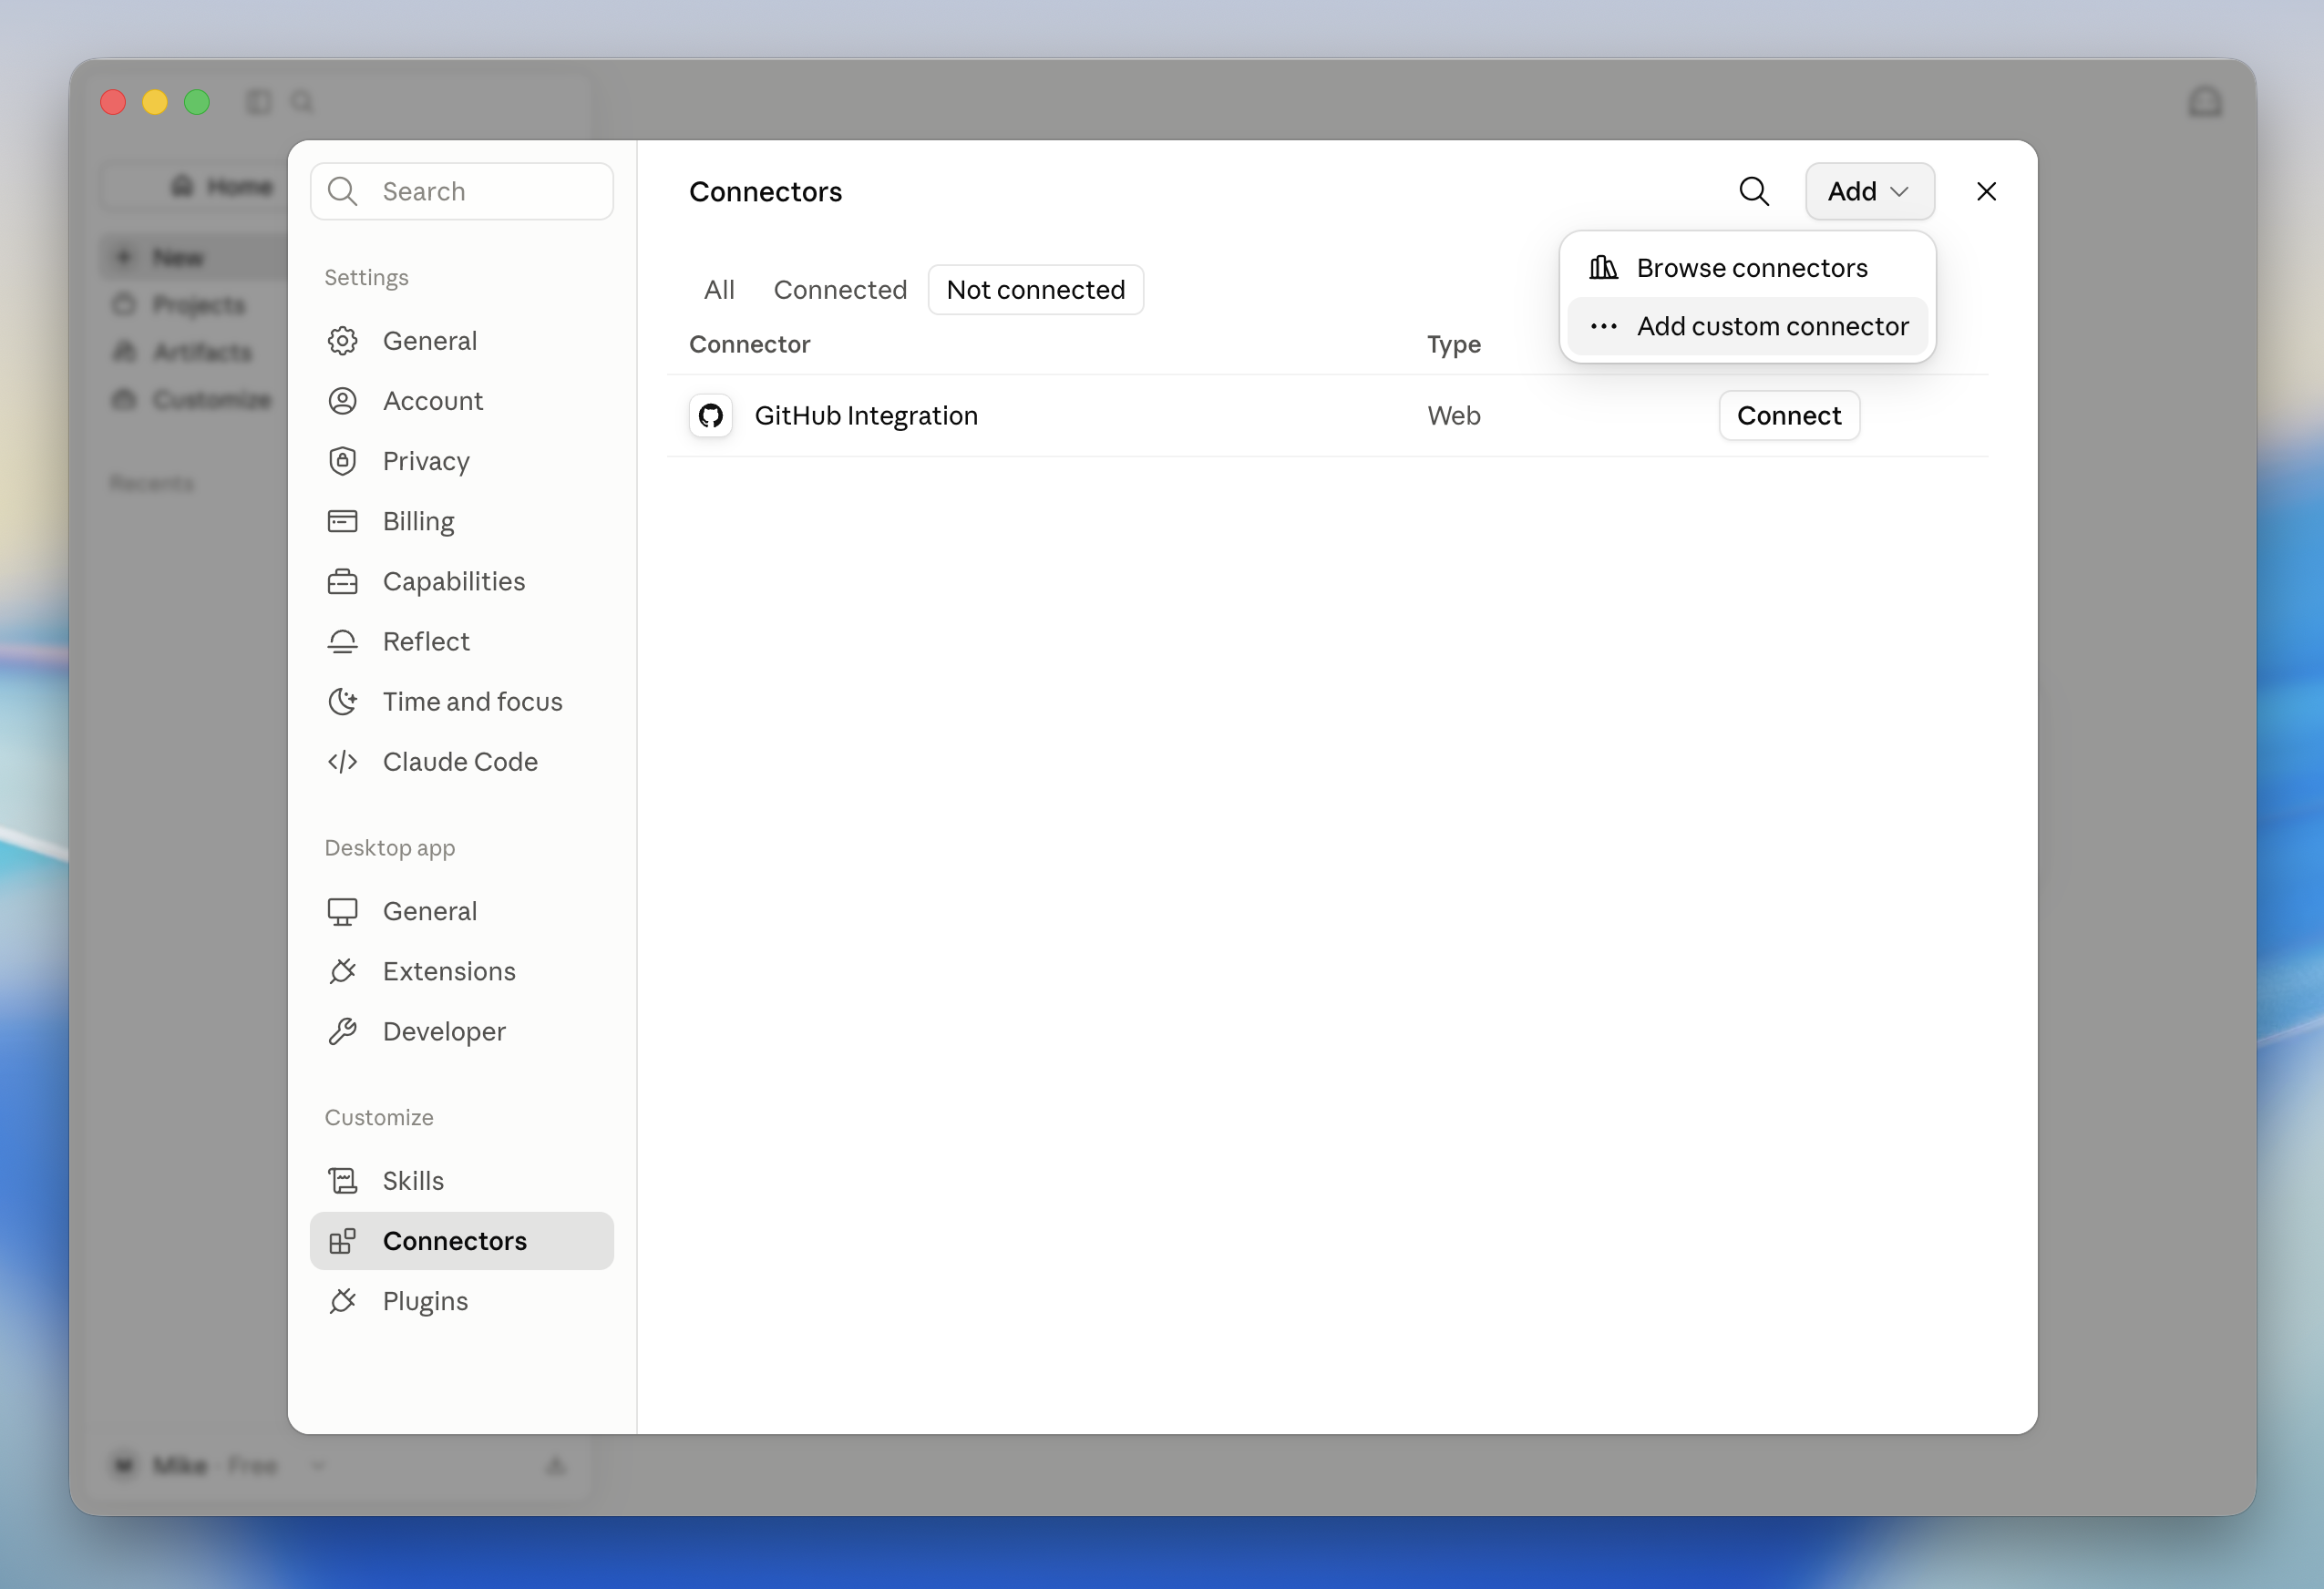
Open Claude, go to Settings → Connectors, and pick Add → Add custom connector.
Step 2: Add a custom connector
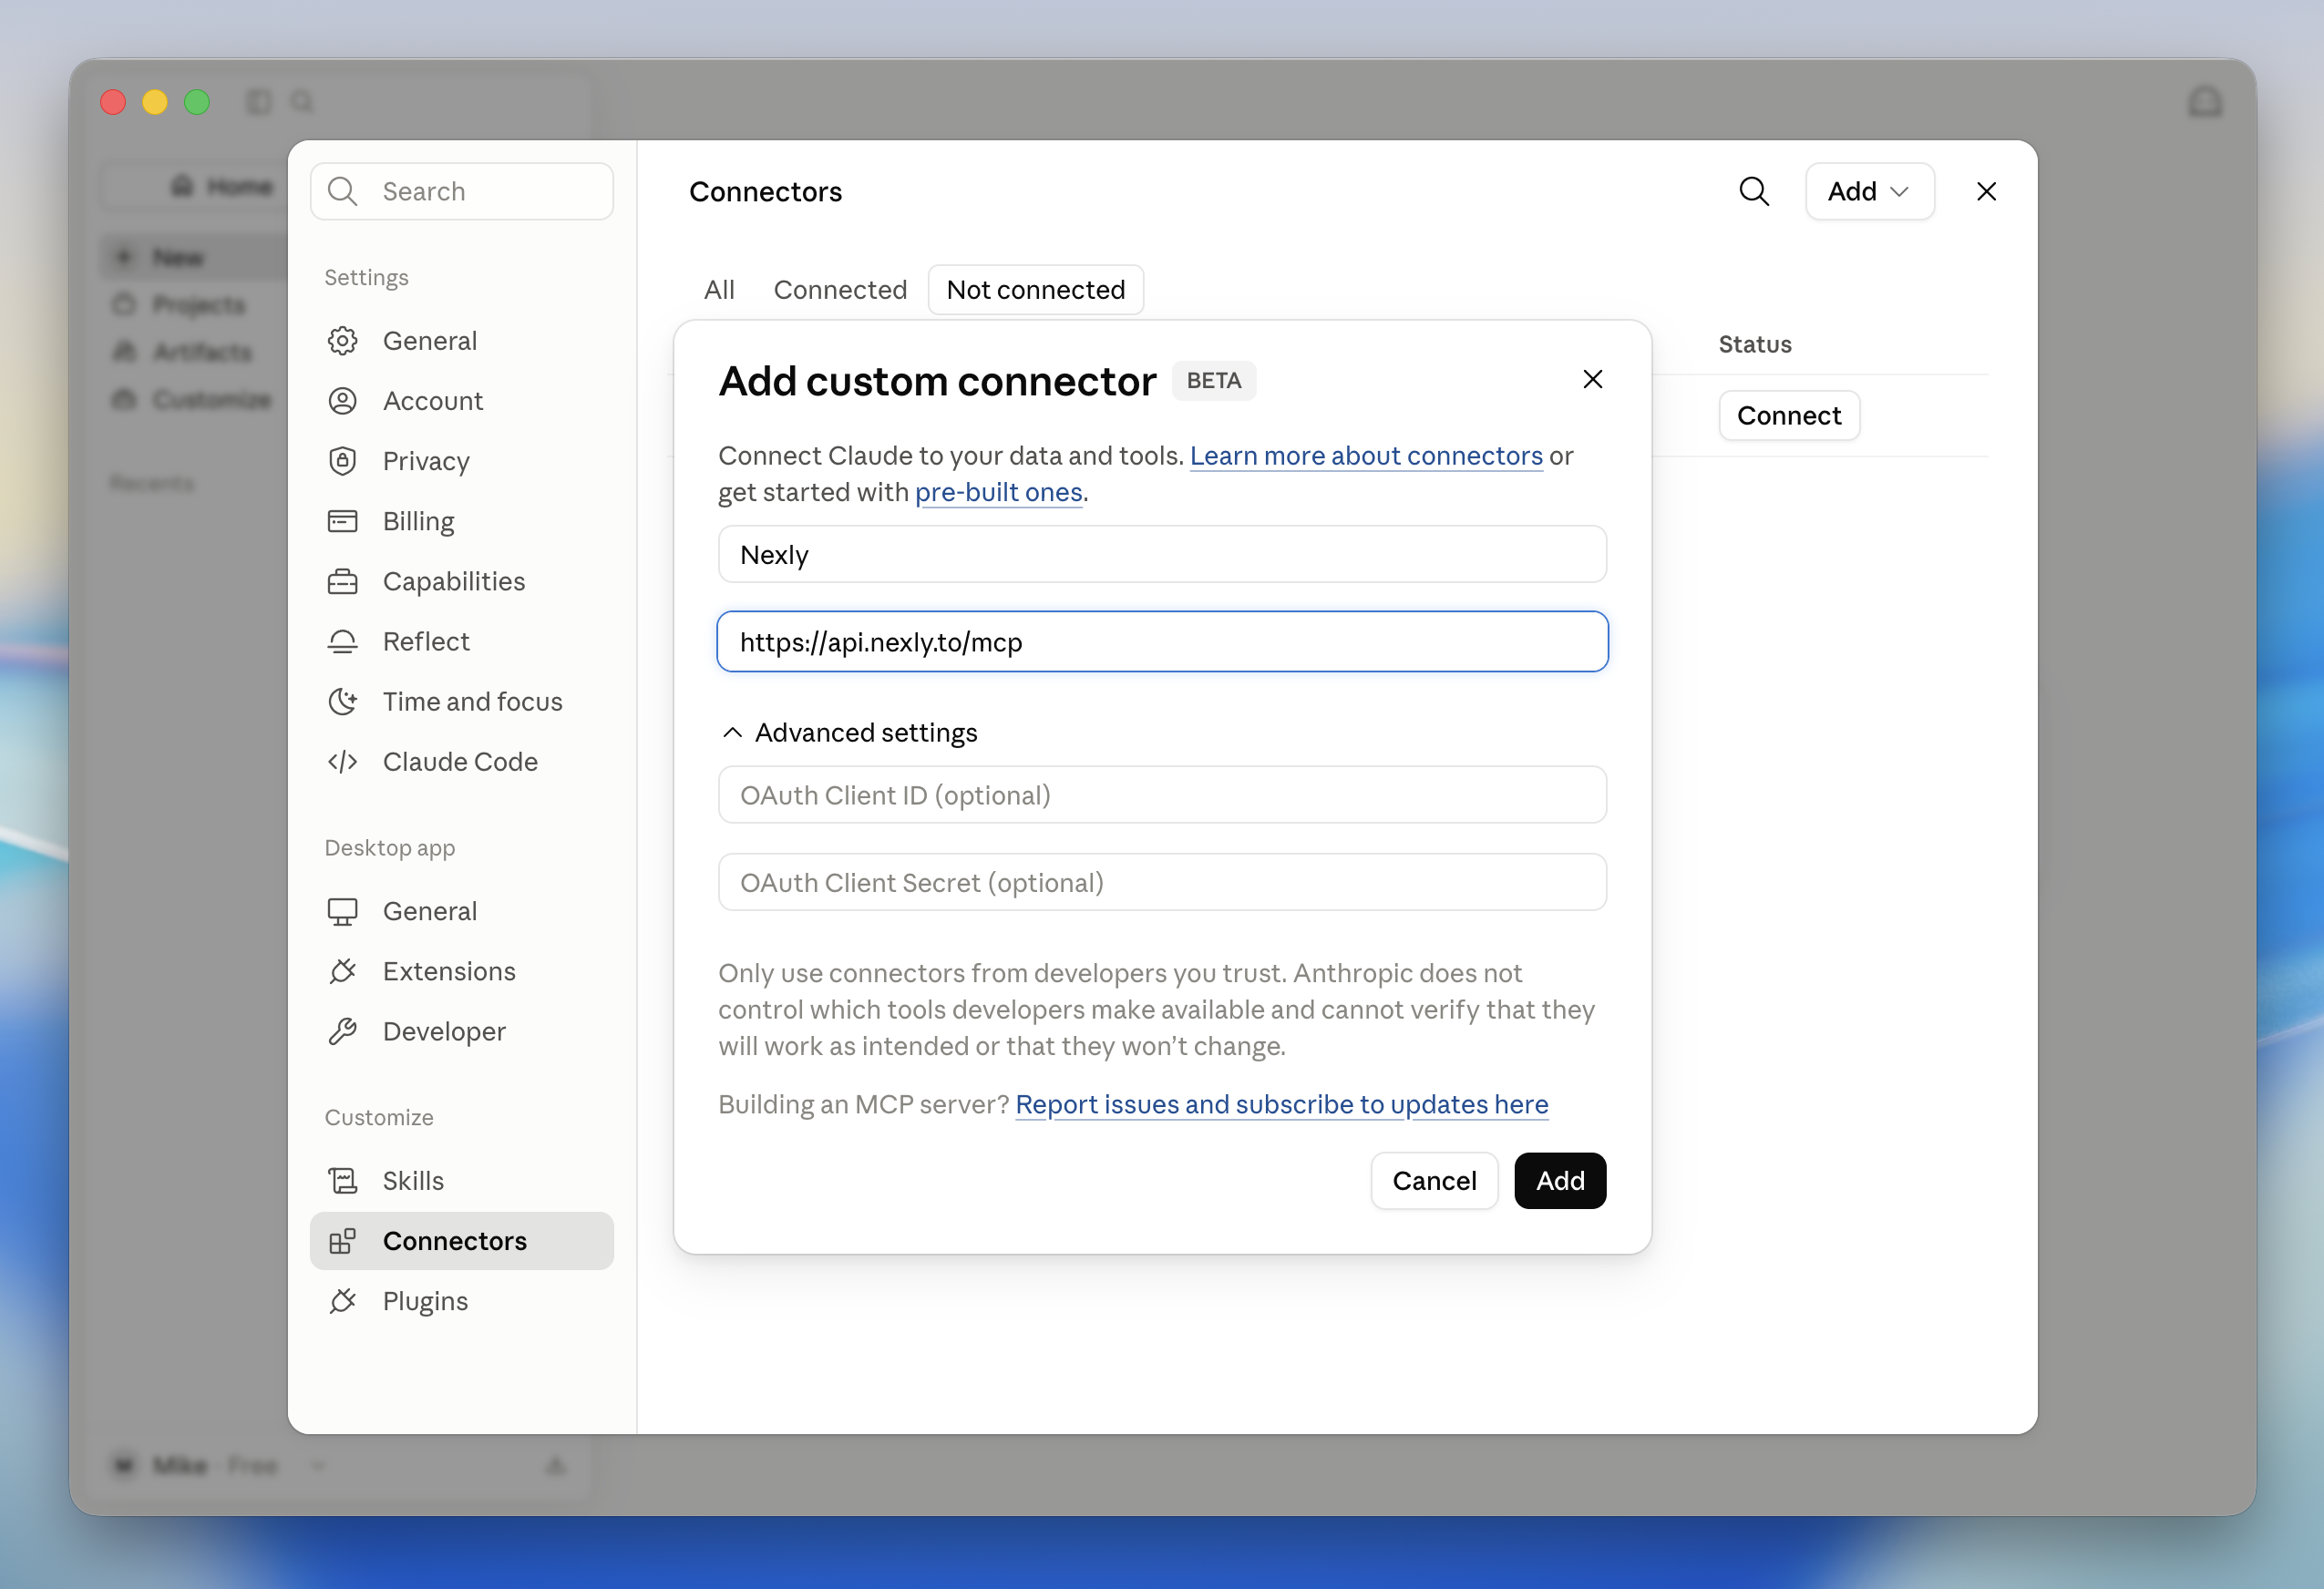
Fill in two fields:
- Name: Nexly
- URL:
https://api.nexly.to/mcp
Leave the OAuth client fields under Advanced settings empty. Click Add.
Step 3: Connect your account
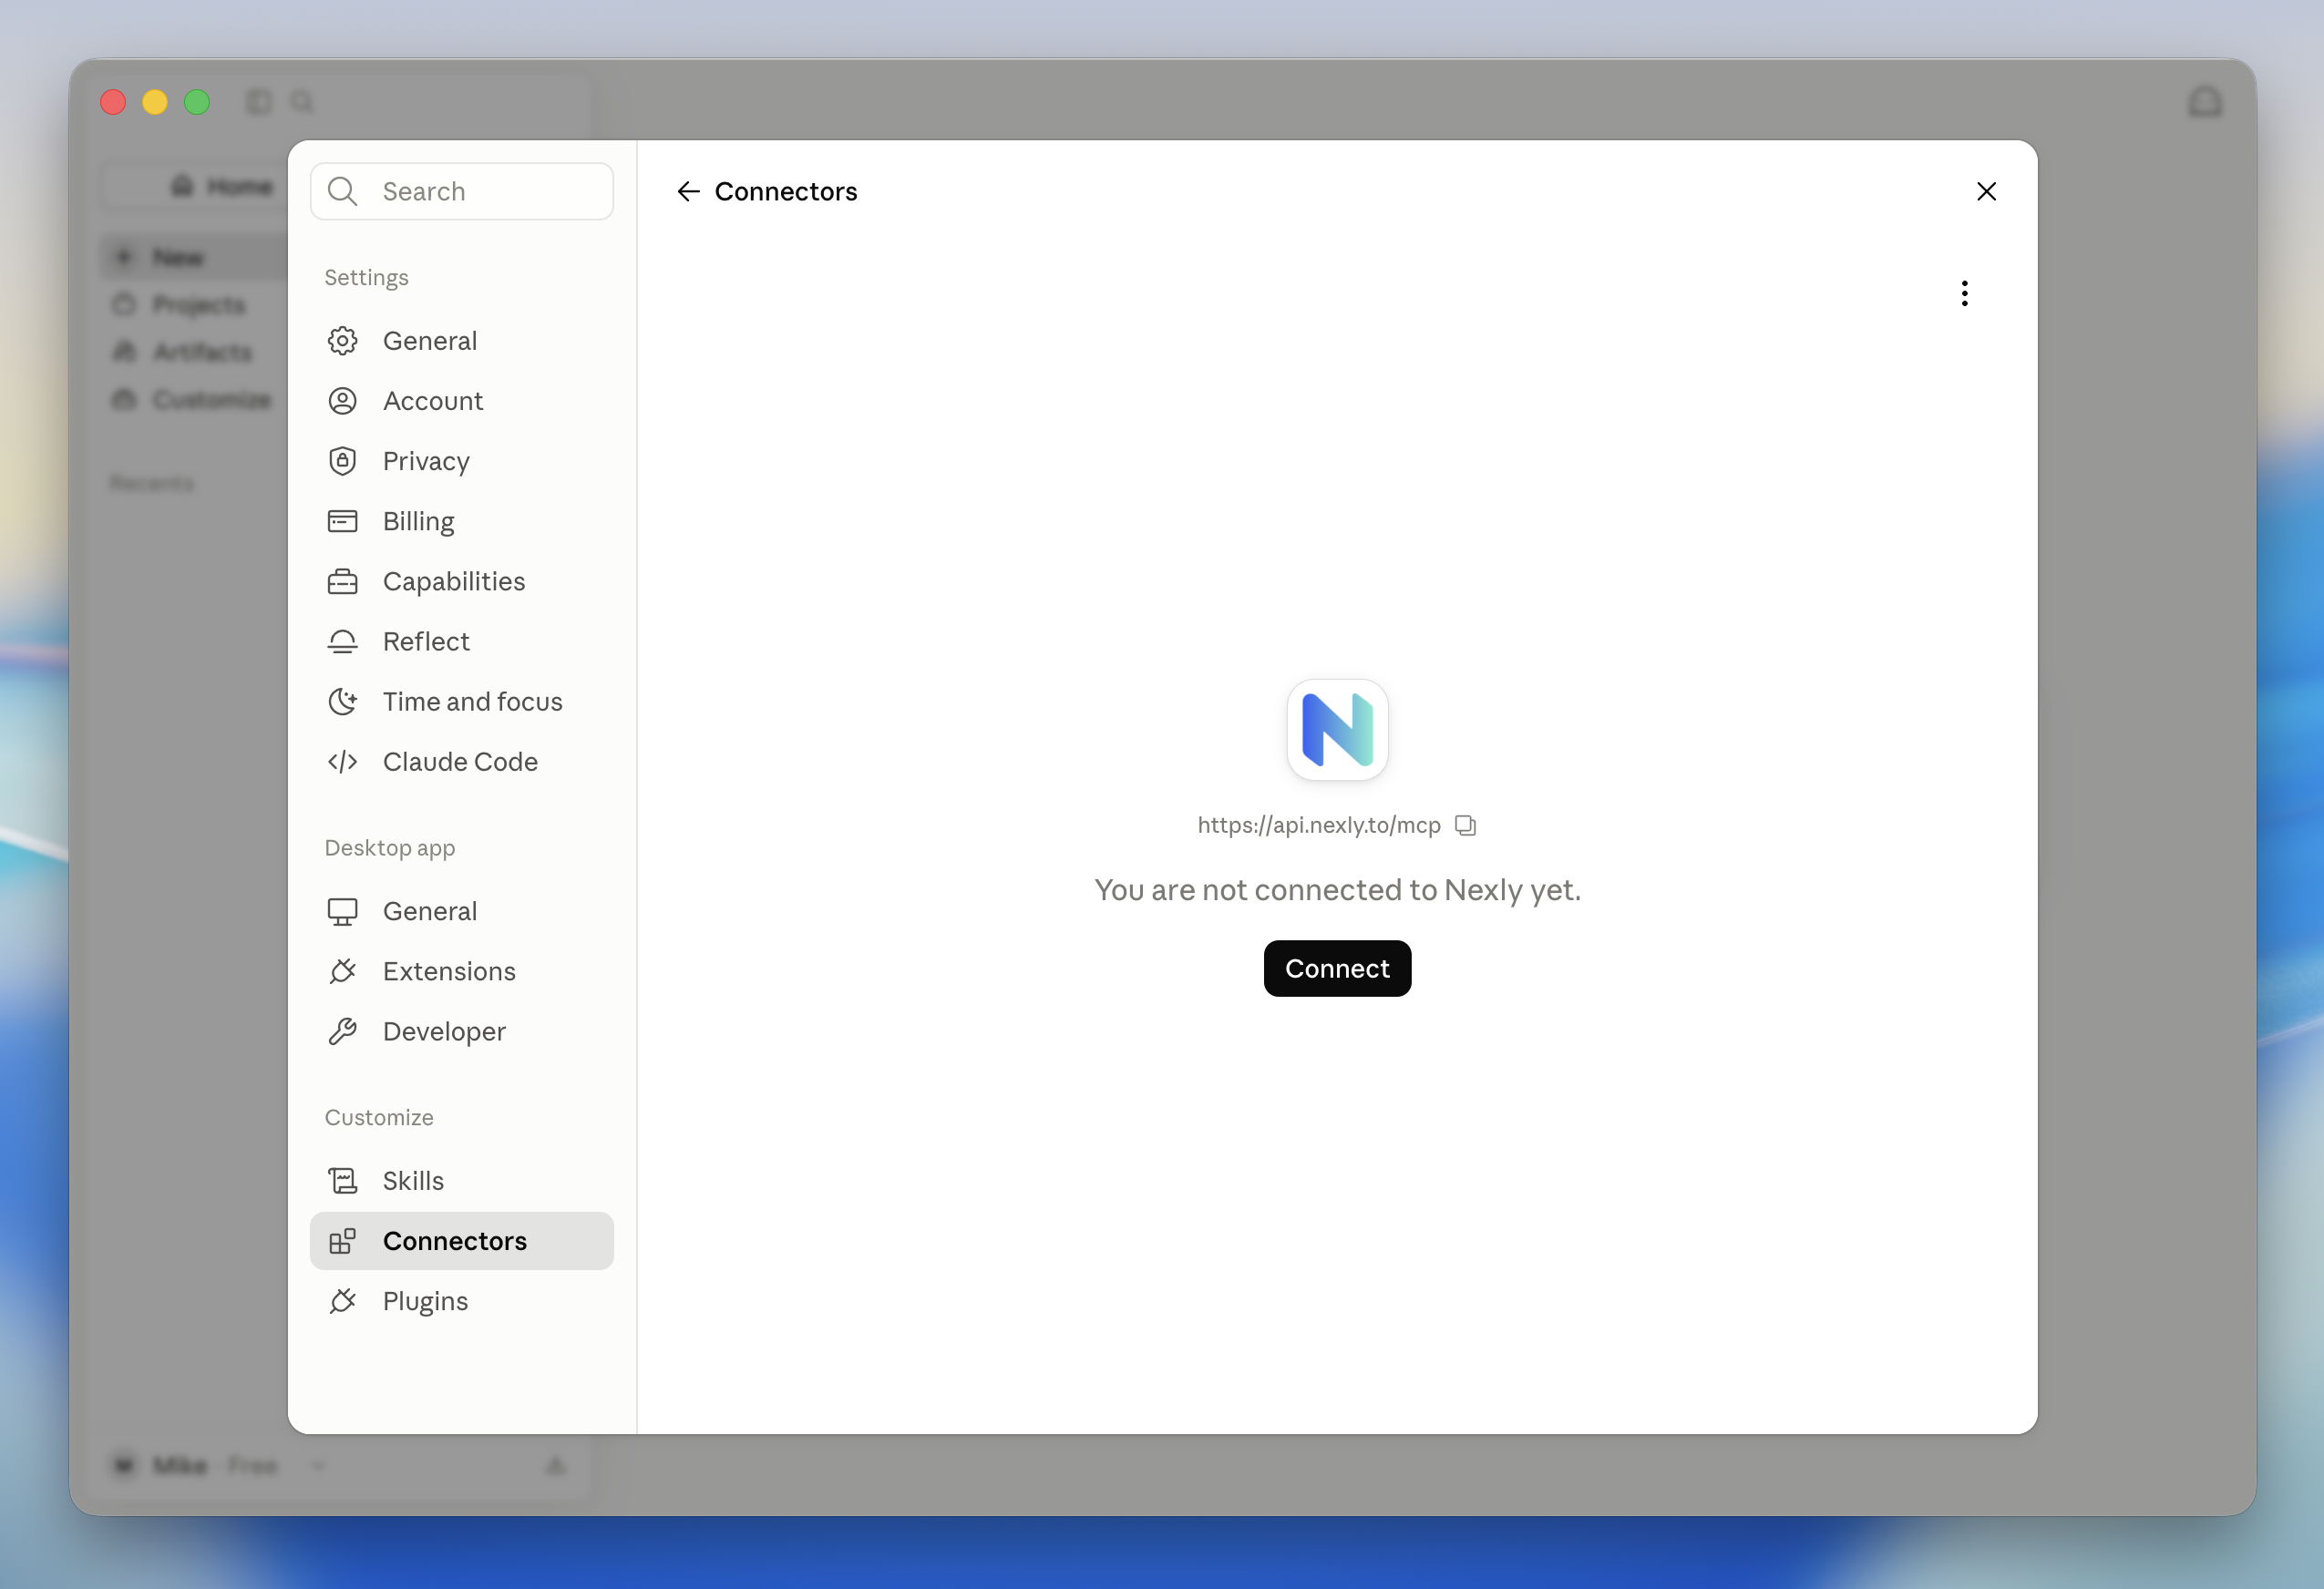
Nexly now appears in your connectors list. Open it and click Connect. Claude opens the Nexly authorization page in your browser; sign in to Nexly first if you are not signed in already.
Step 4: Authorize Claude in Nexly
The authorization page shows exactly what Claude will be able to do: read Analytics, Reports, Funnels, and Properties, and manage Apps, funnels and settings. Review the permissions and click Authorize.

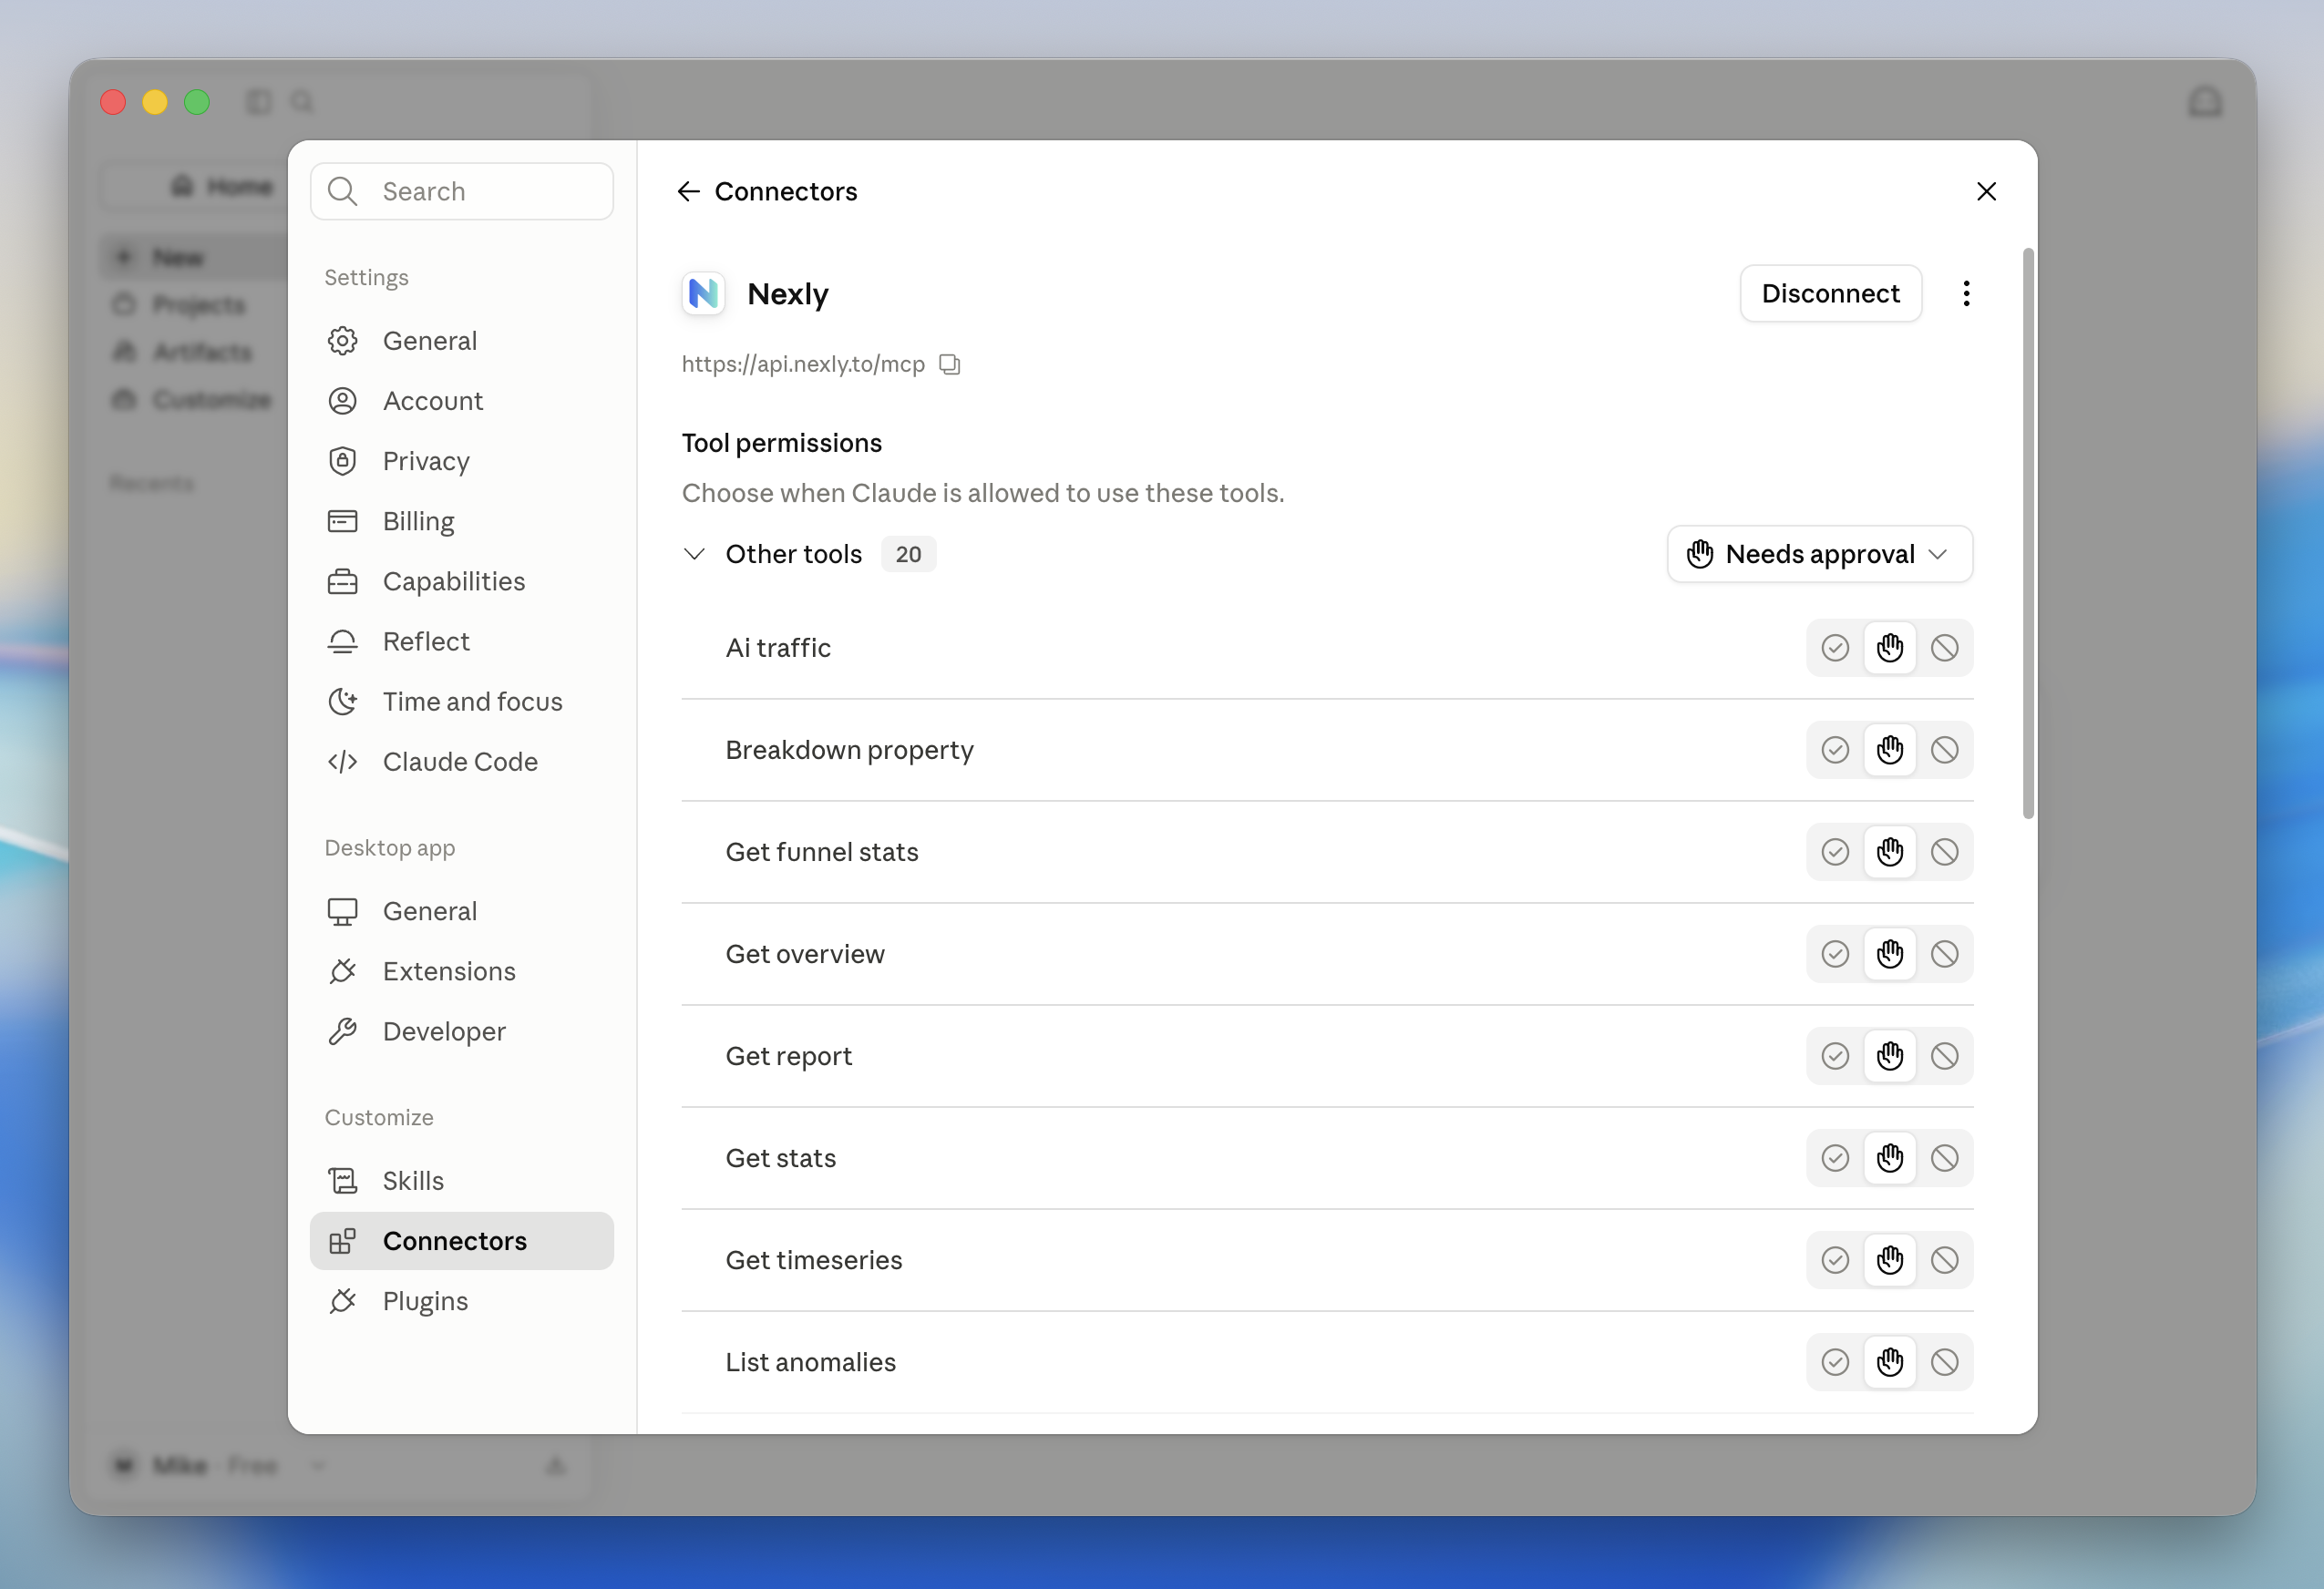
Once authorized, you return to Claude and the connection is active — the connector page lists the available Nexly tools and lets you tune per-tool approval. The same connector works in Claude Desktop, on claude.ai, and in the Claude mobile apps.
Connect Nexly to Claude Code
In a terminal, add the server and sign in:
claude mcp add --transport http nexly https://api.nexly.to/mcp
claude mcp login nexly
The login command opens the Nexly authorization page in your browser. Review the permissions and click Authorize.
Connect Nexly to Cursor
Cursor connects to remote MCP servers with OAuth as well.
Step 1: Add the server
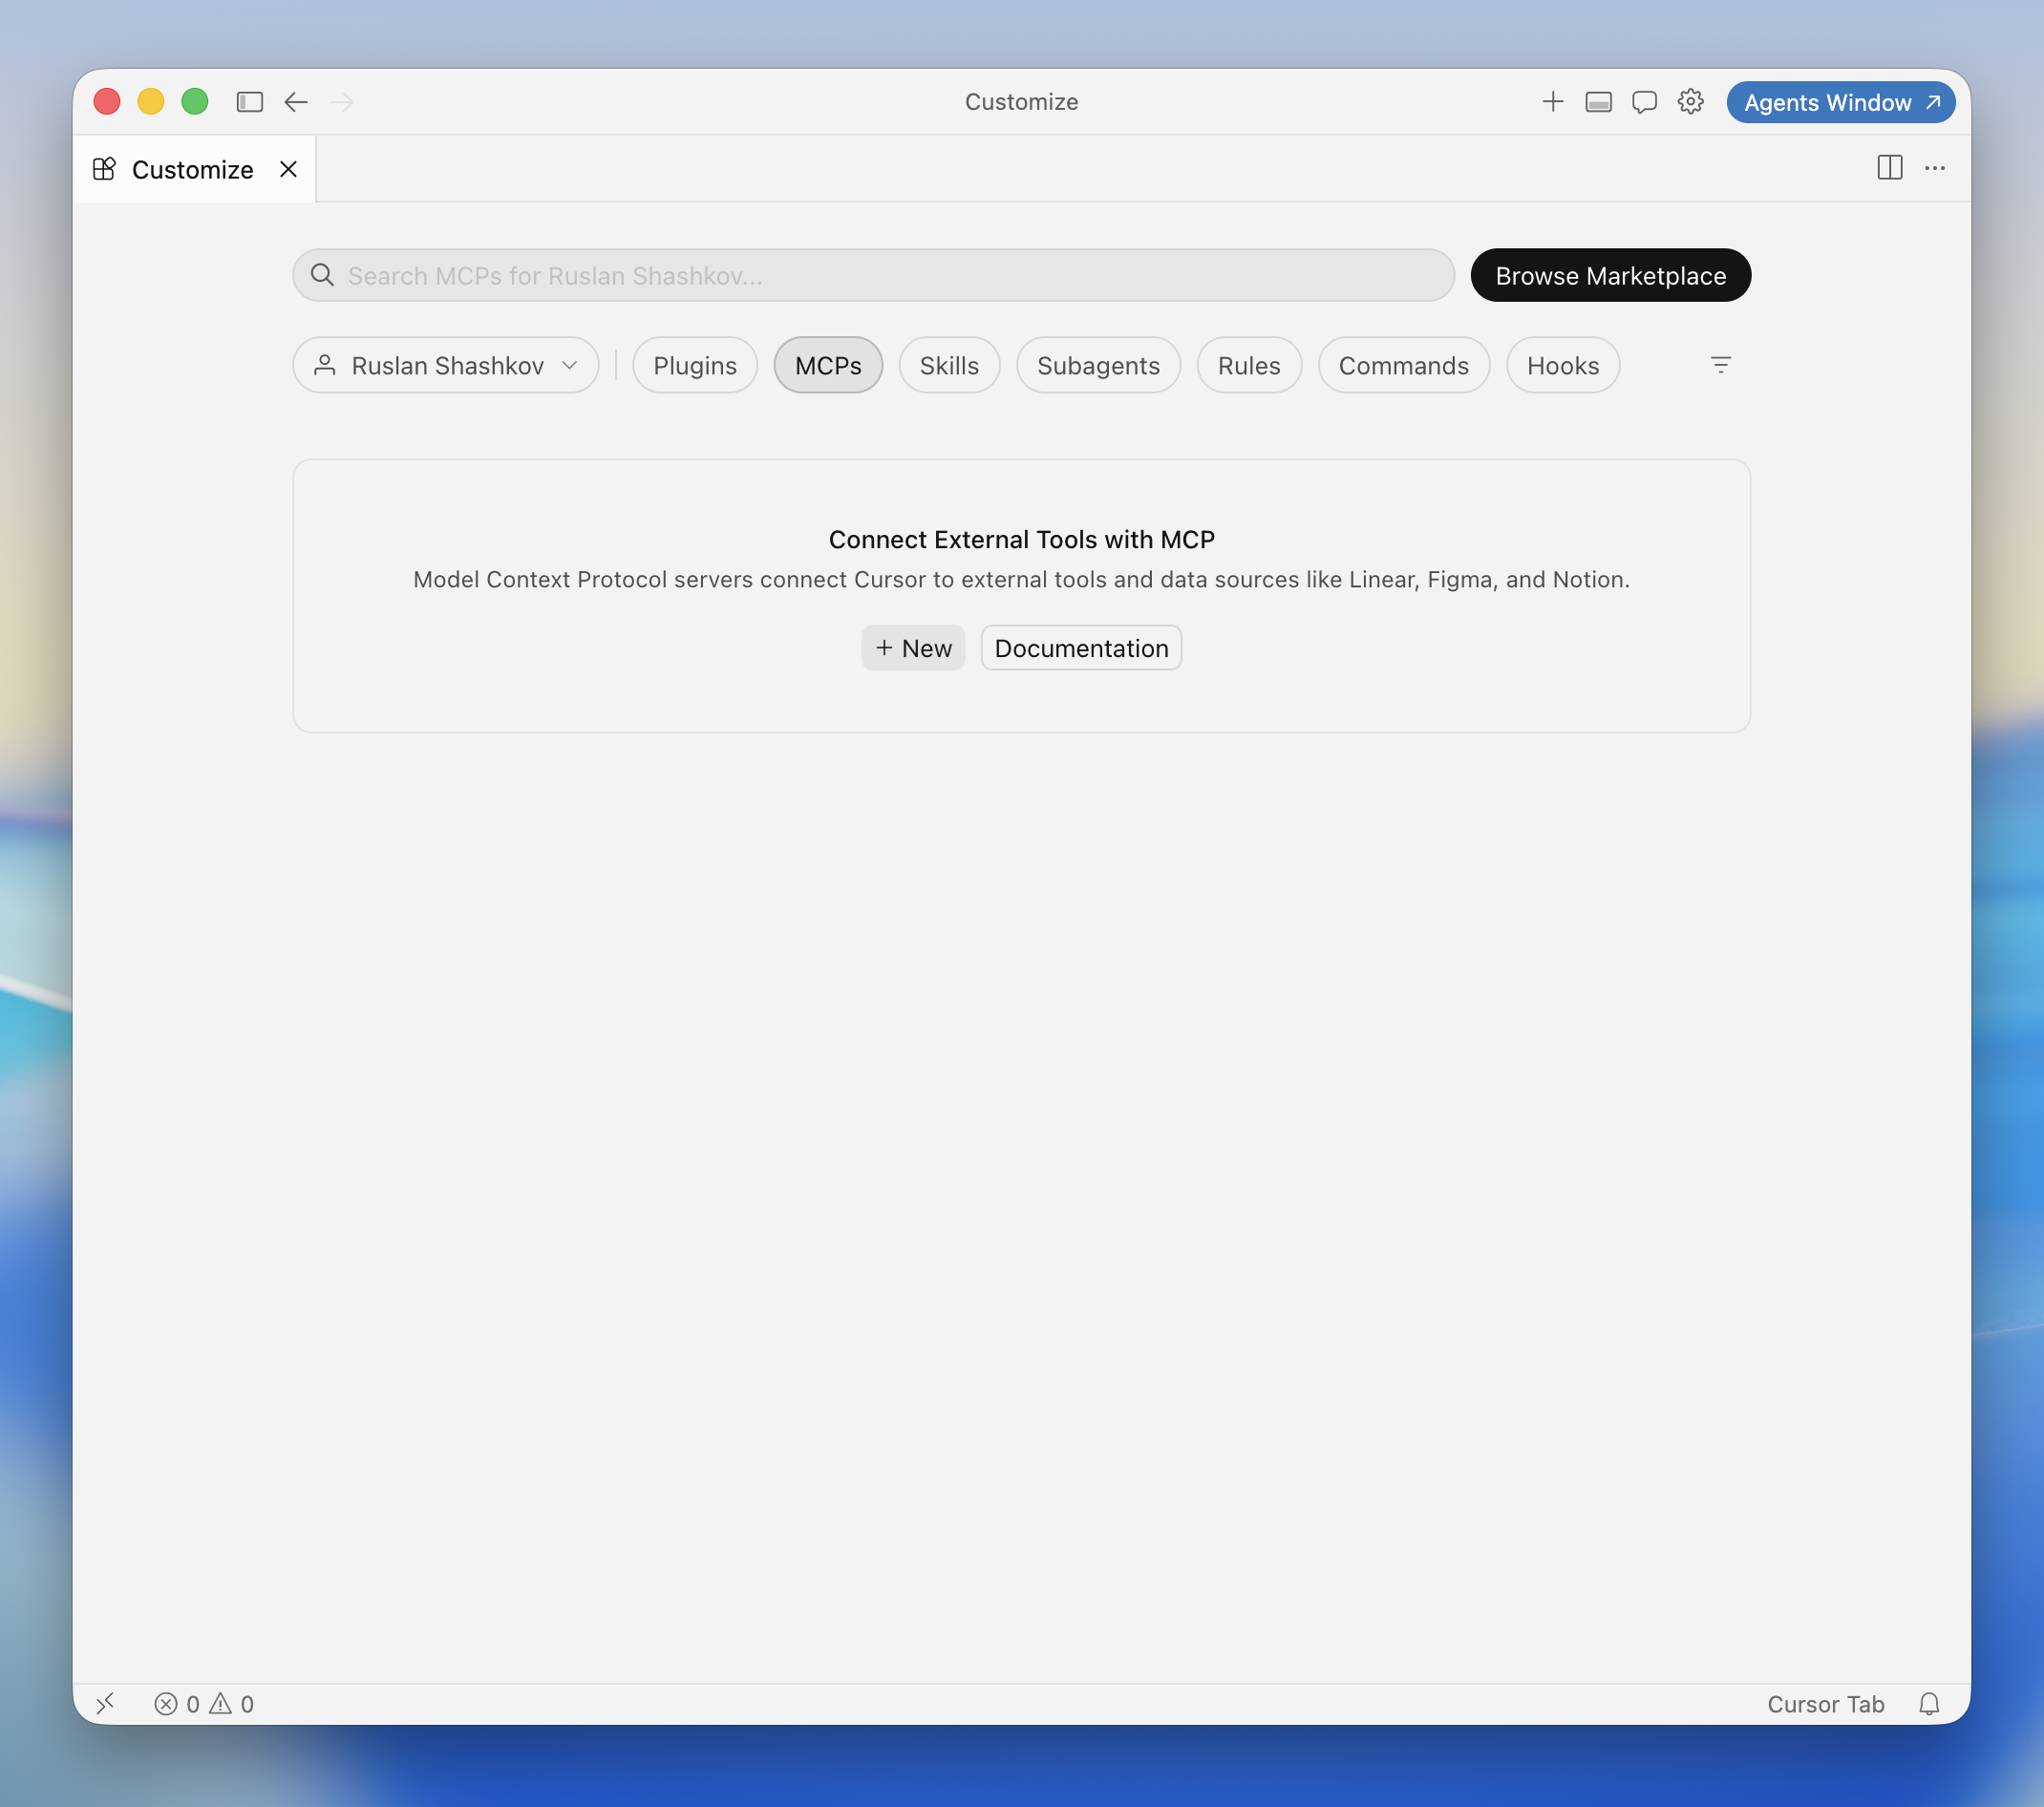
Open Customize → MCPs and click New MCP Server (or New).
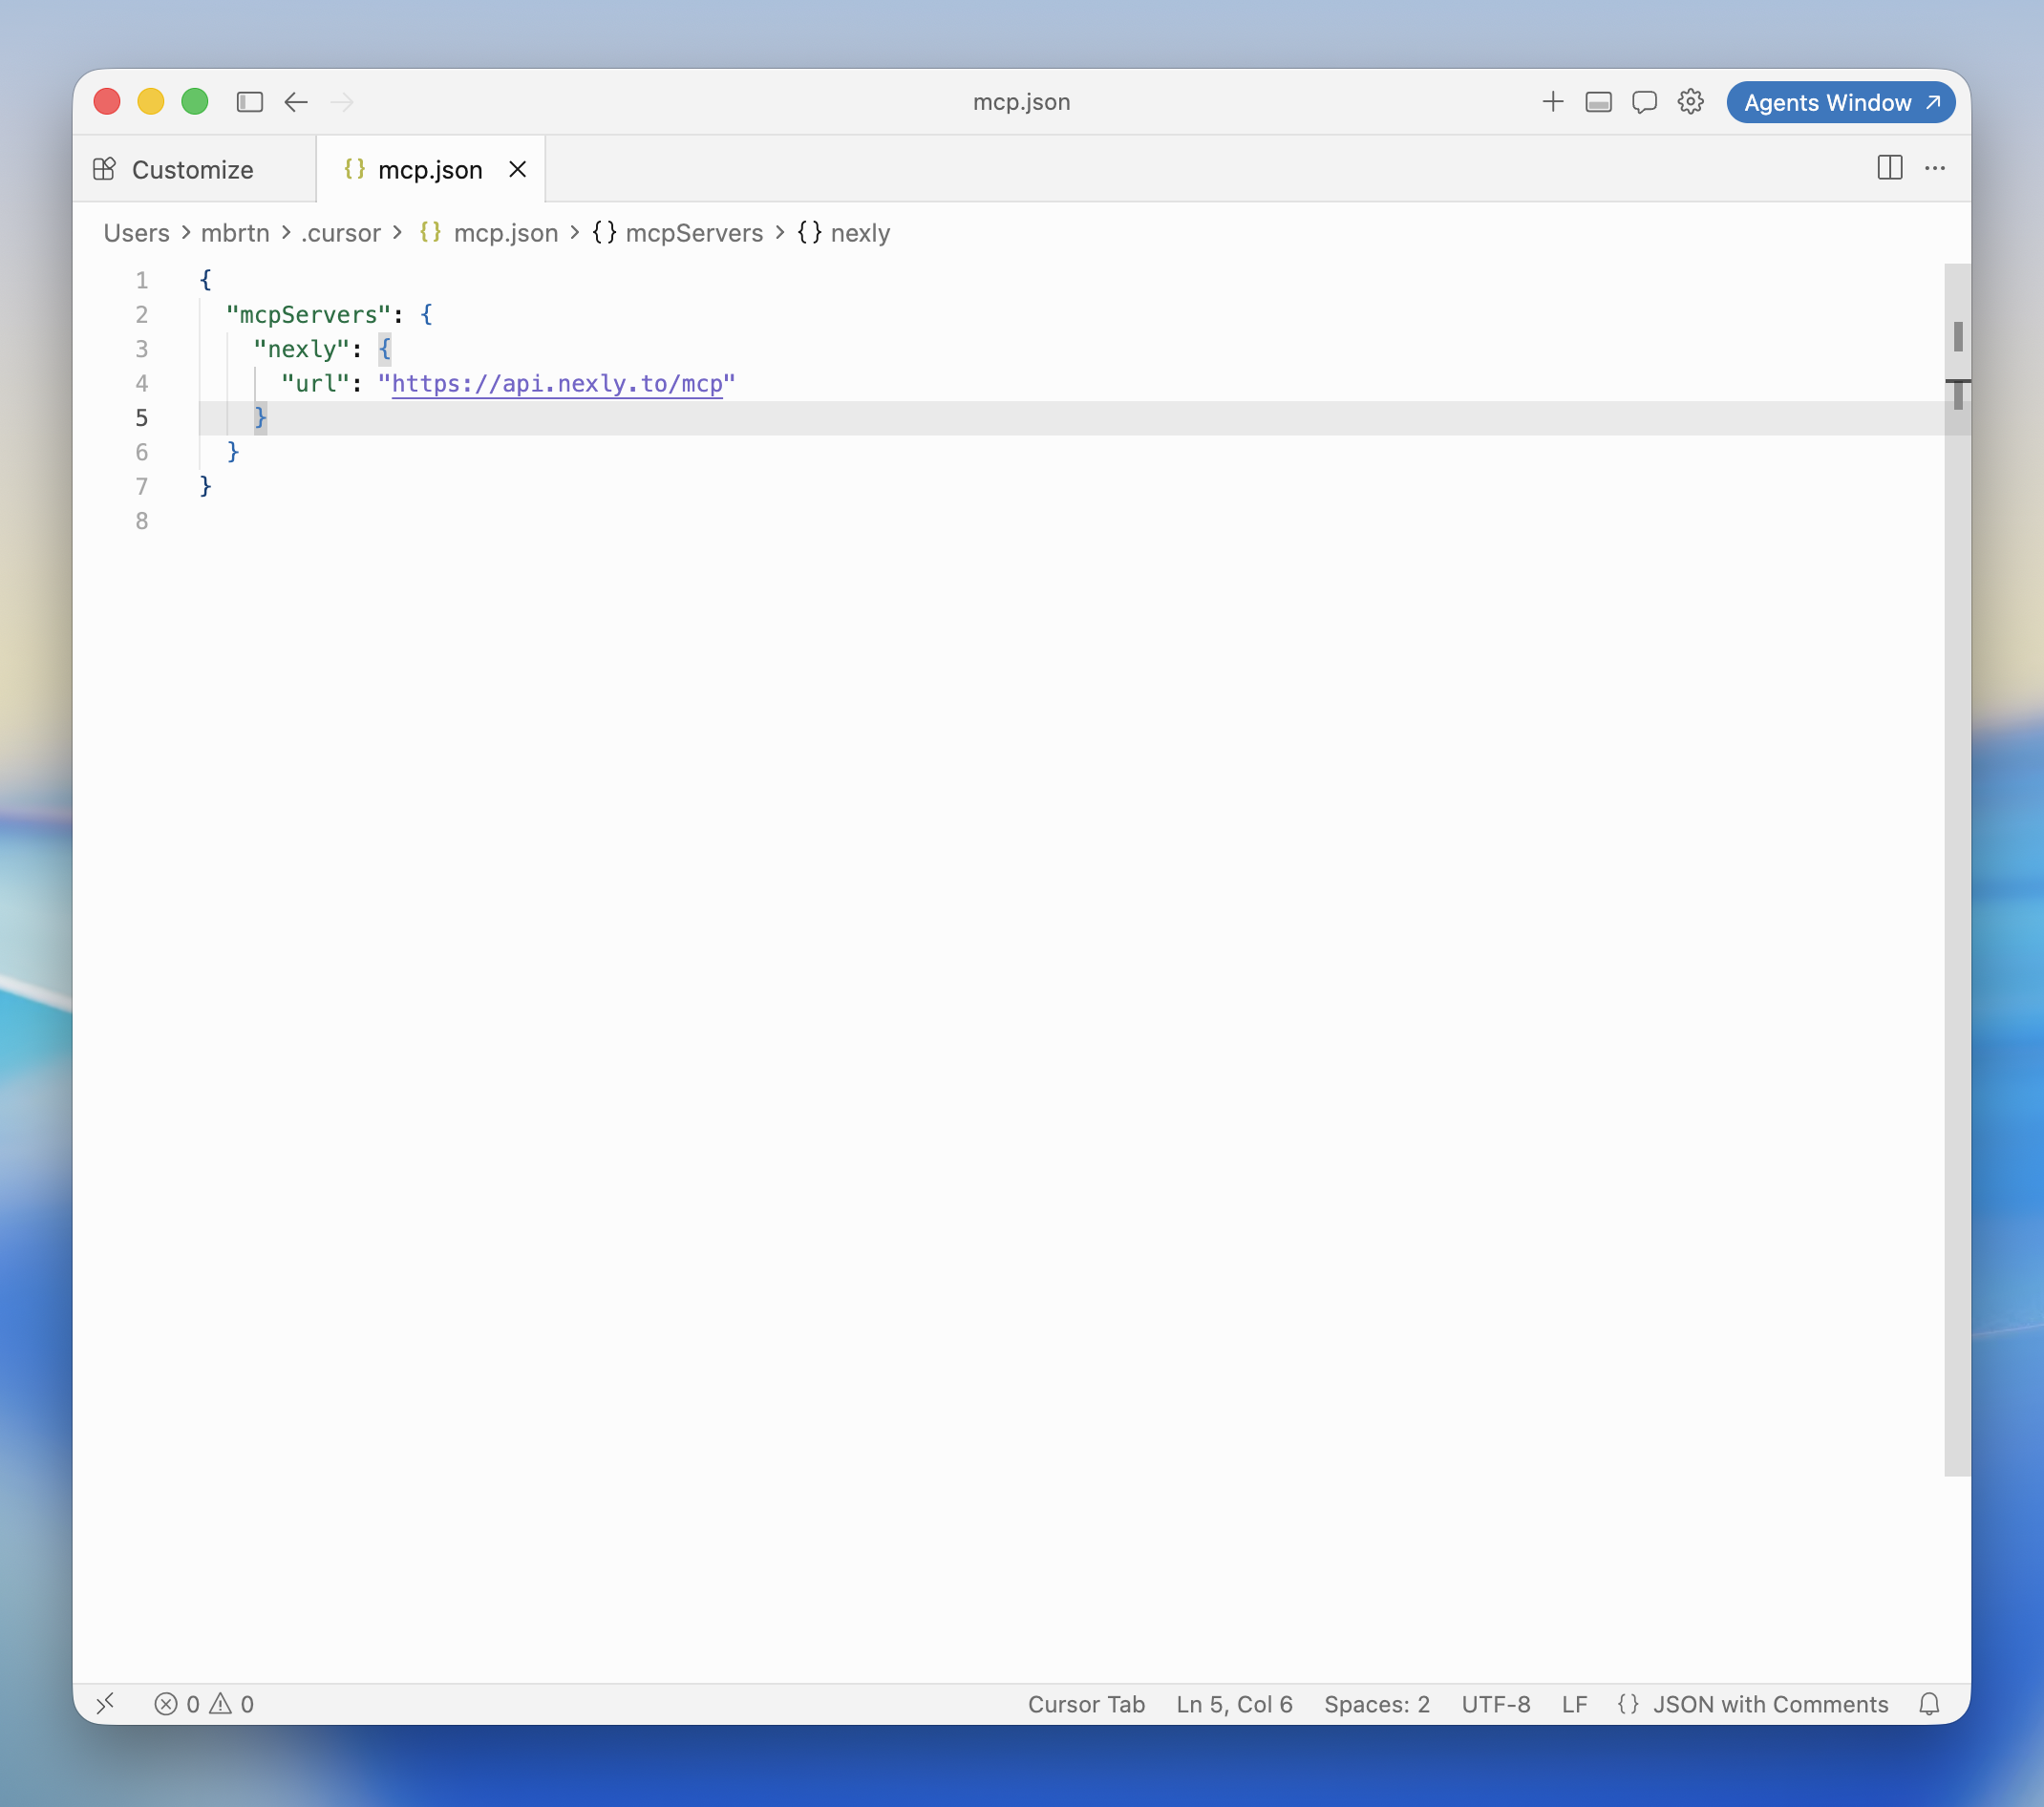
Cursor opens ~/.cursor/mcp.json; add the Nexly server there:
{
  "mcpServers": {
    "nexly": {
      "url": "https://api.nexly.to/mcp"
    }
  }
}
Step 2: Authenticate
Back in the MCPs list, Nexly shows up as Needs authentication. Click Authenticate.
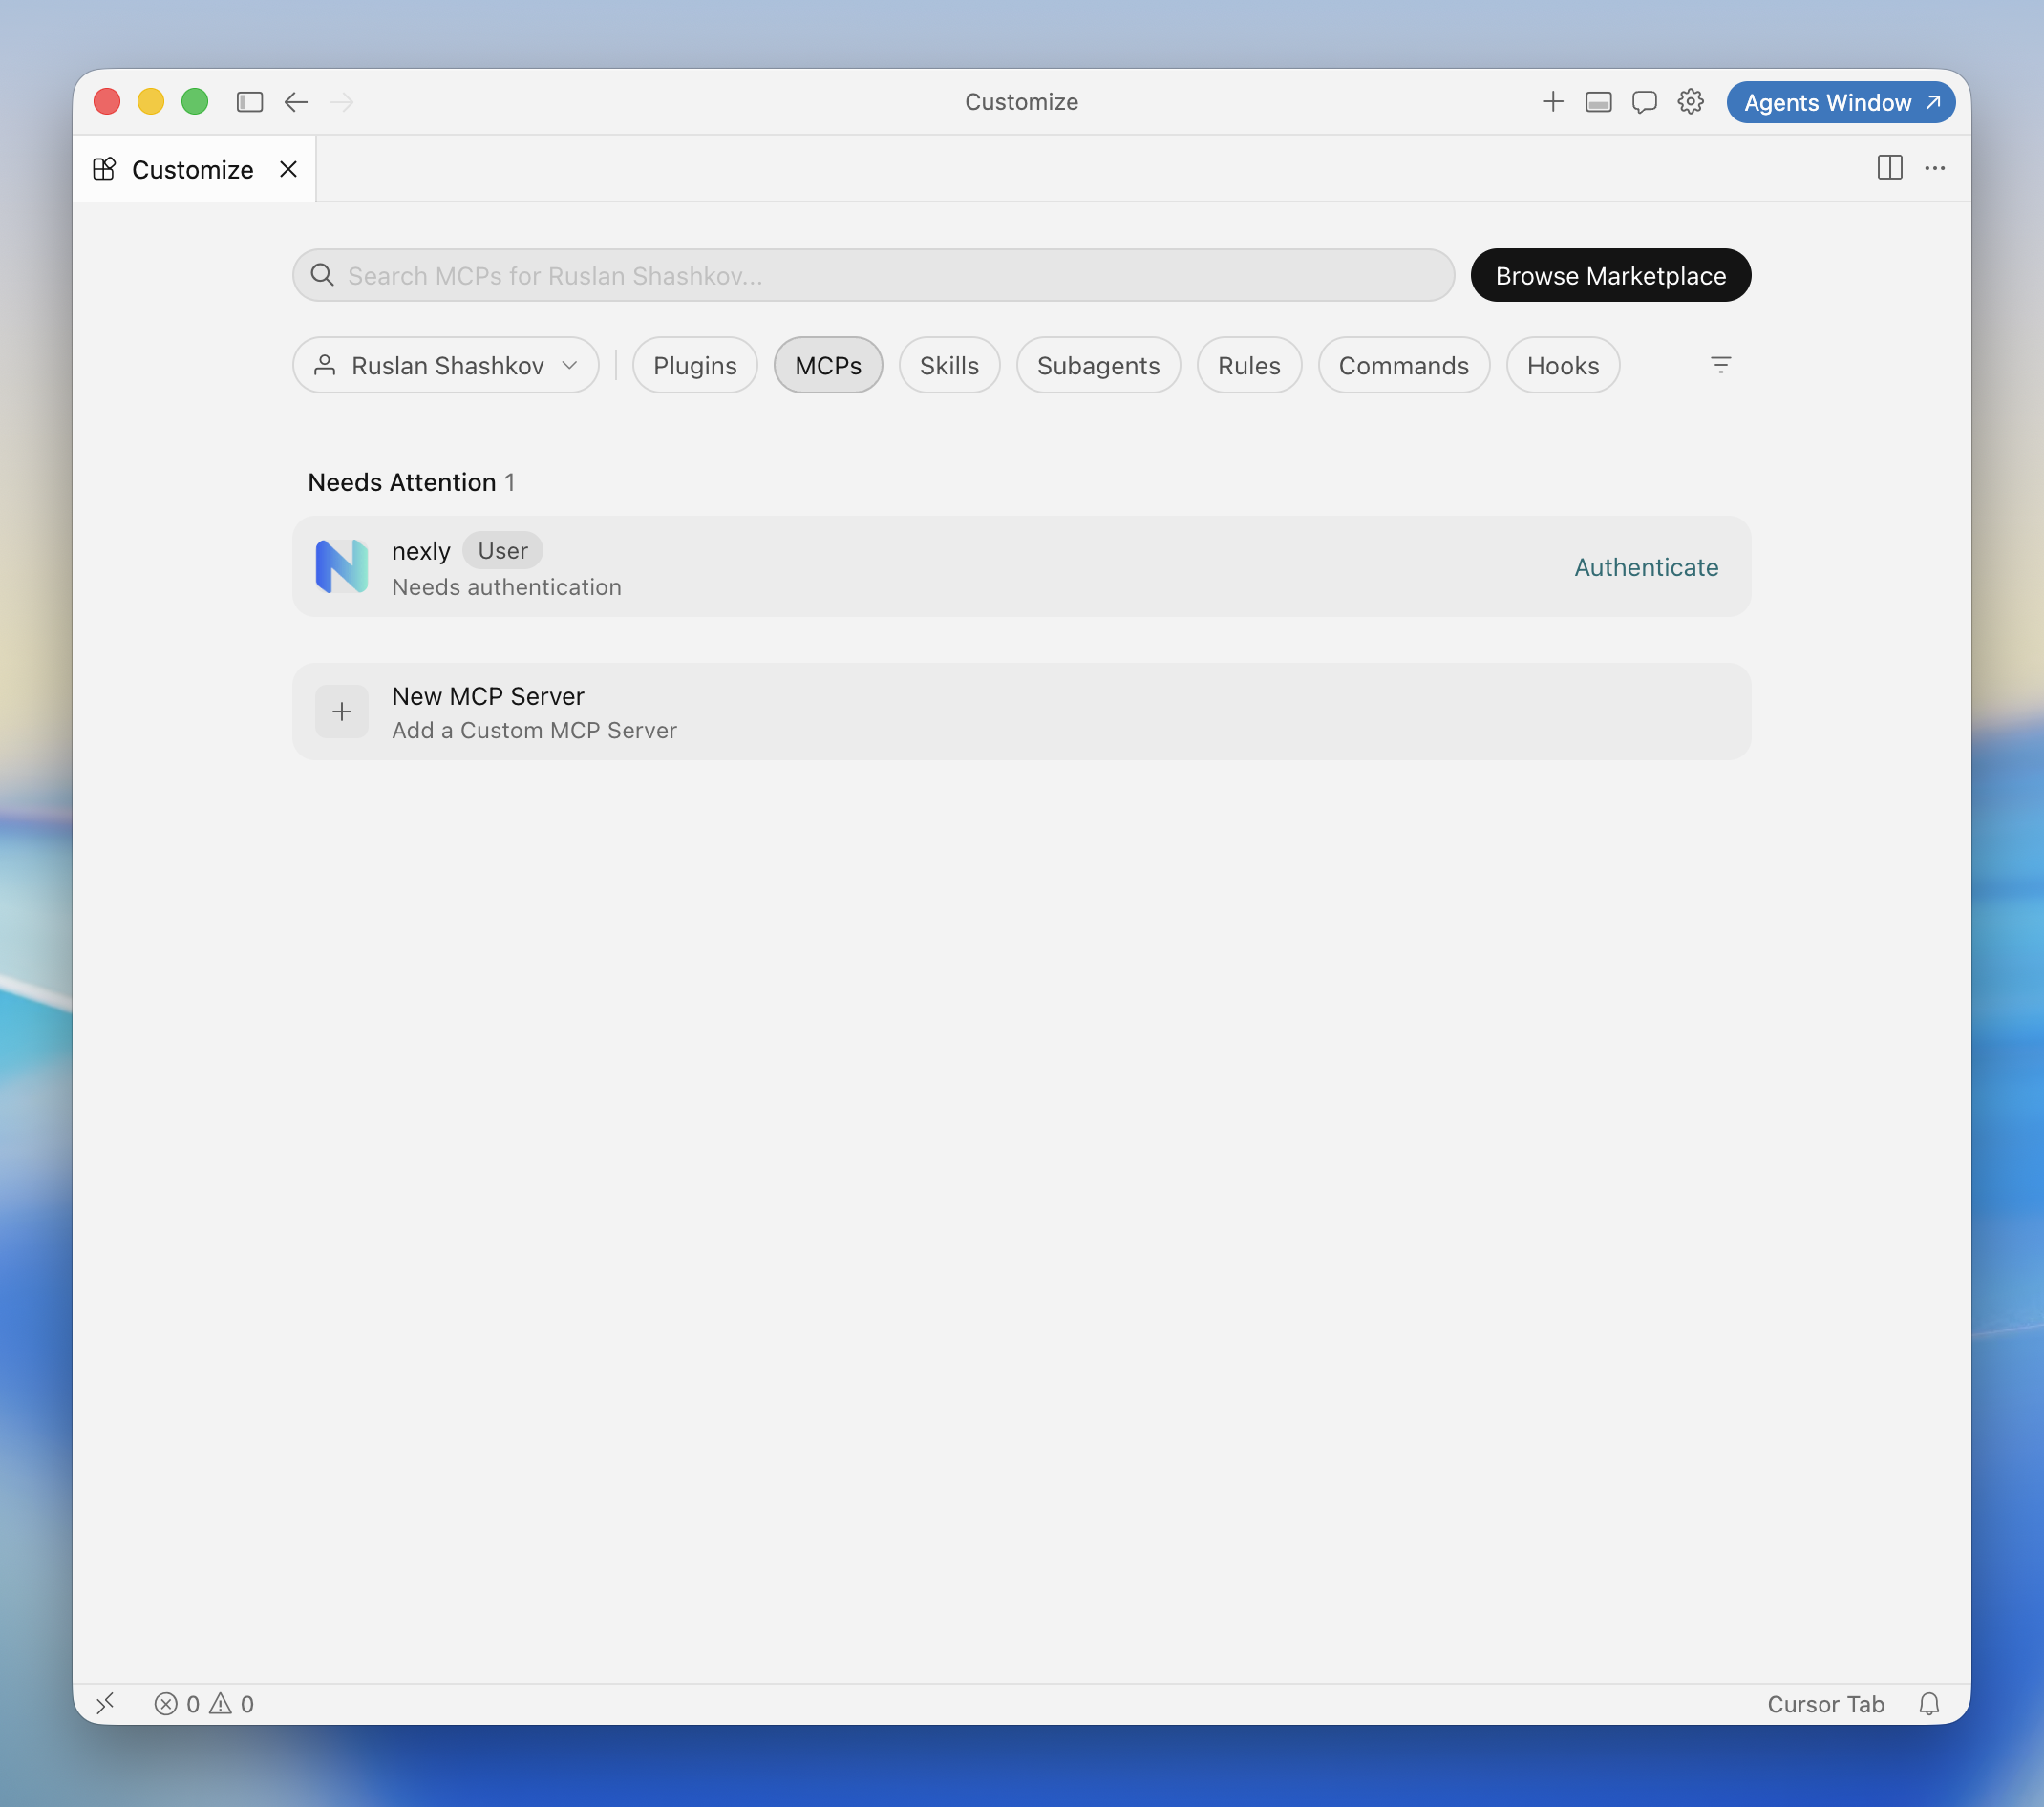
Cursor opens the Nexly authorization page in your browser. Review the permissions and click Authorize.

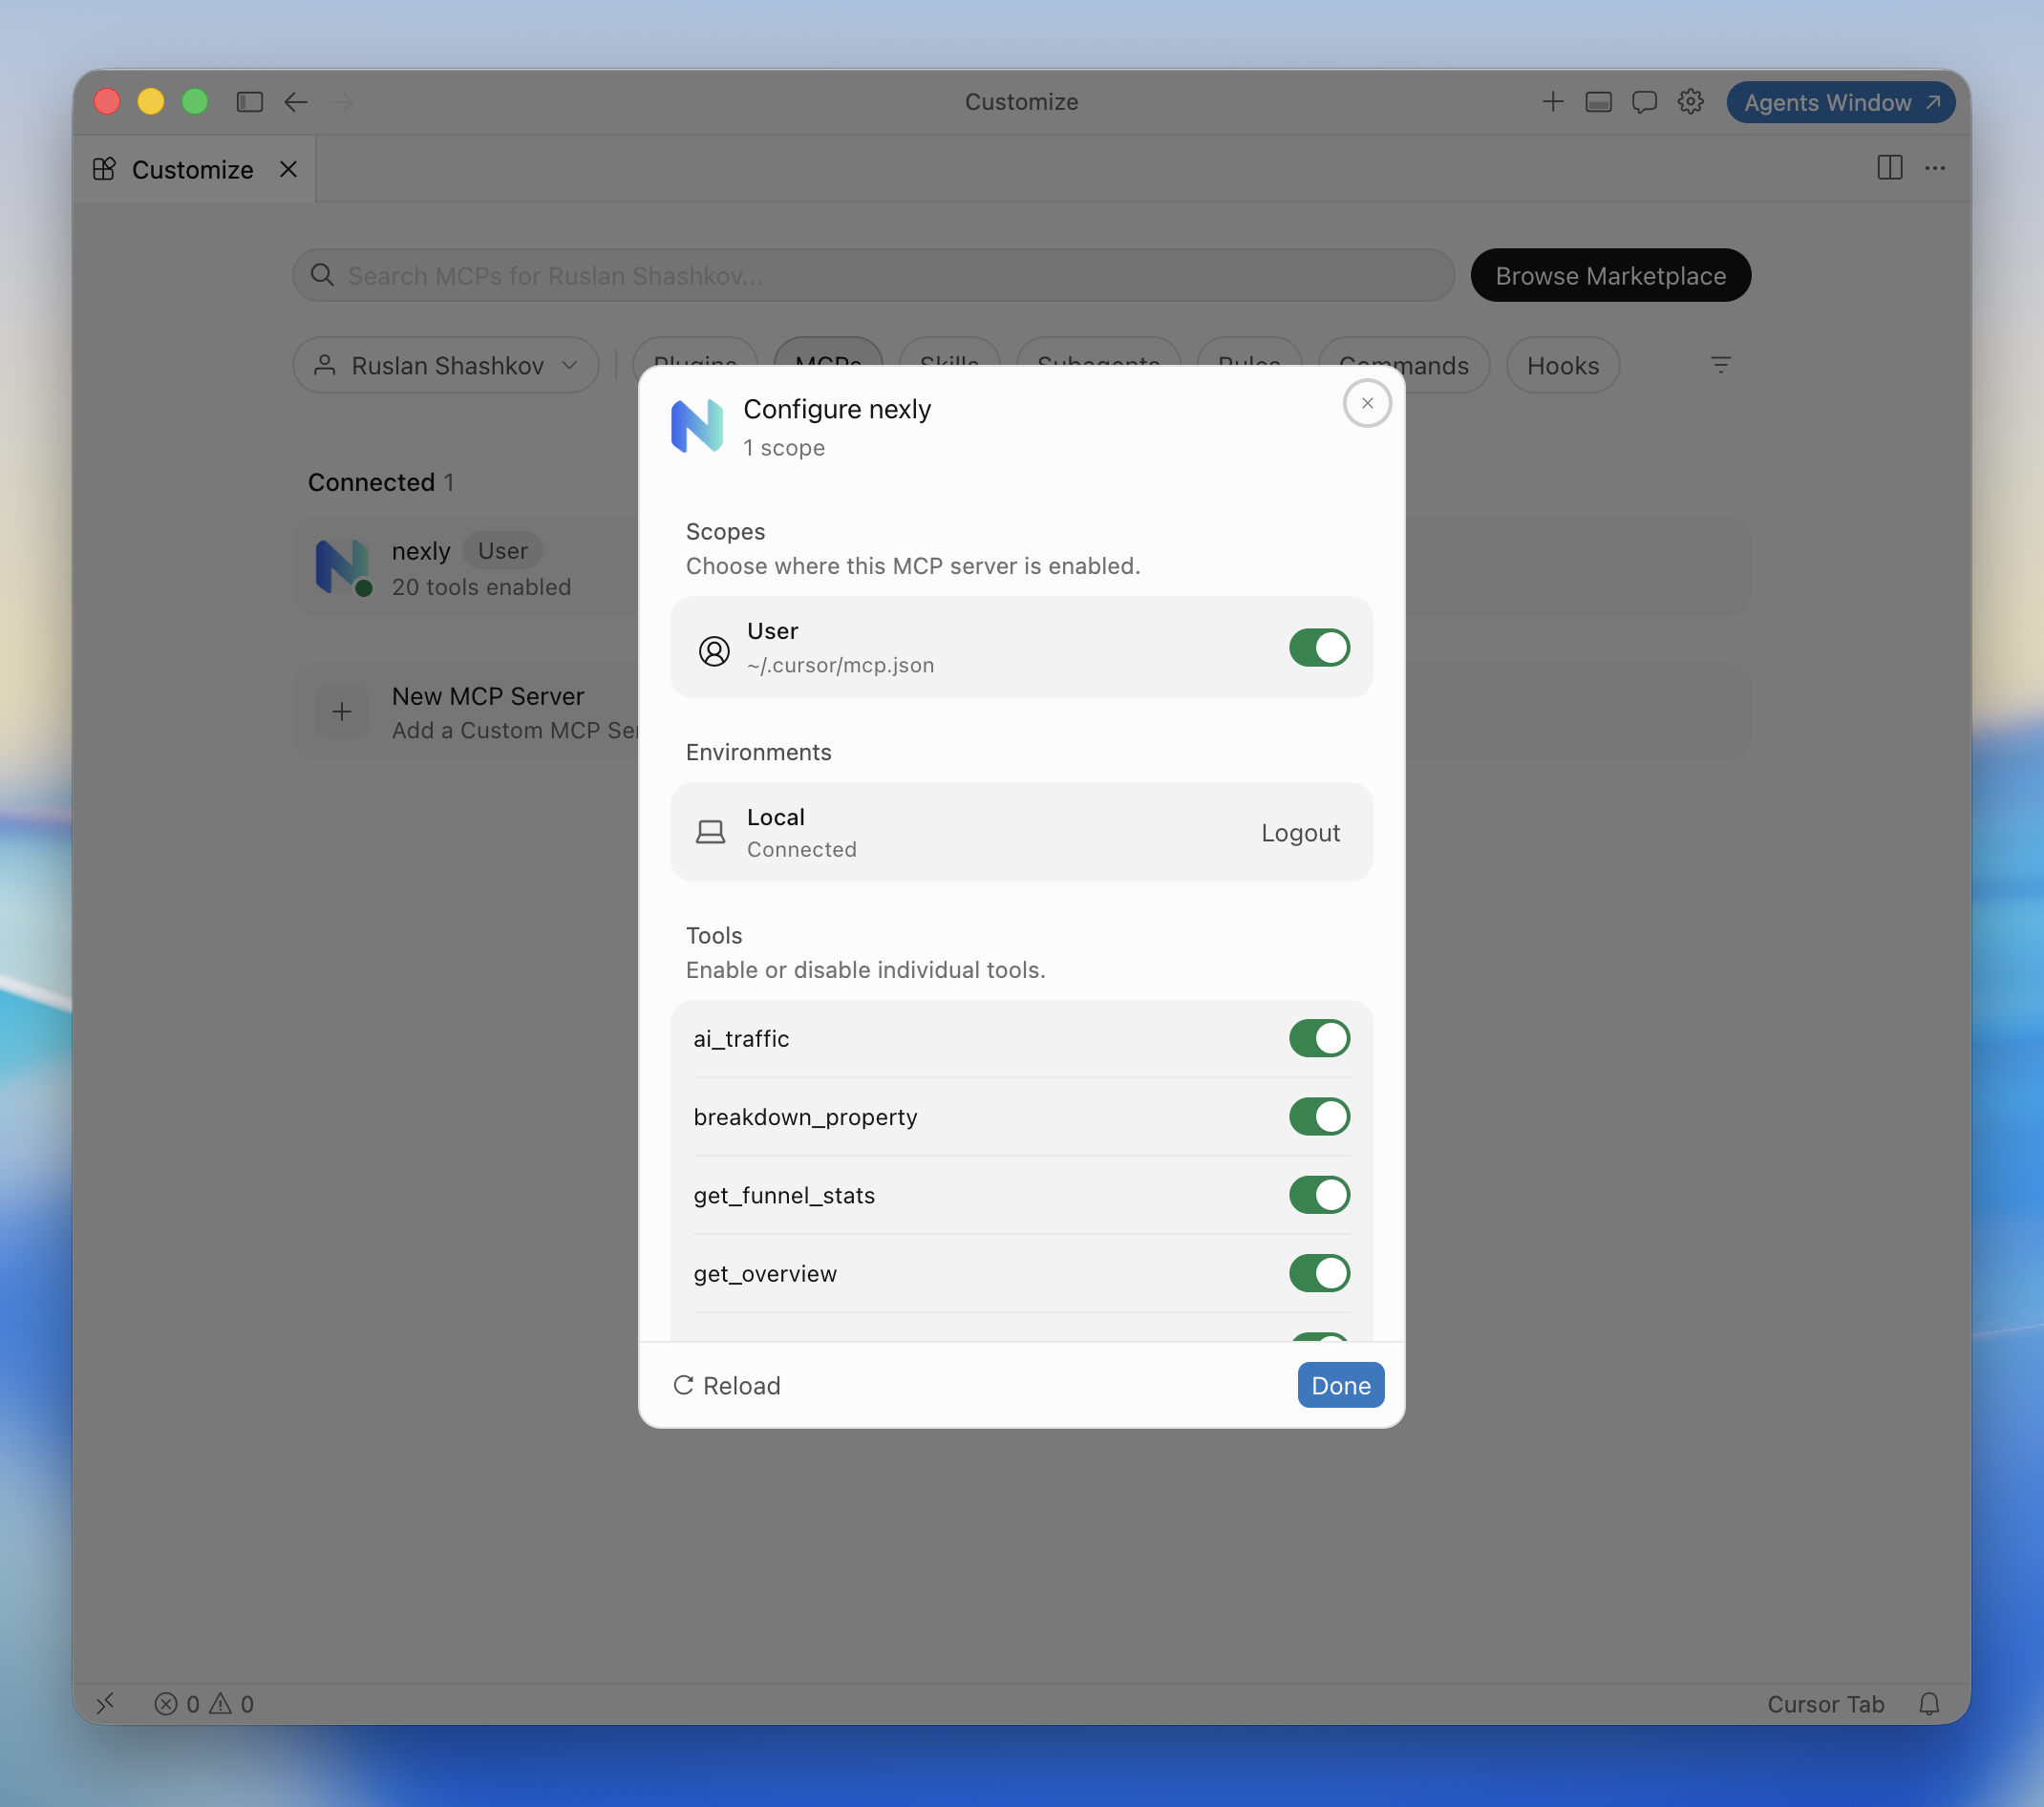
Once connected, the server appears in the list with its tools enabled; open its settings to toggle individual tools.
Connect Nexly to Codex
Codex connects to remote MCP servers over Streamable HTTP with OAuth. The desktop app, CLI, and IDE extension share one MCP configuration, so adding Nexly once makes it available everywhere.
Step 1: Open MCP settings
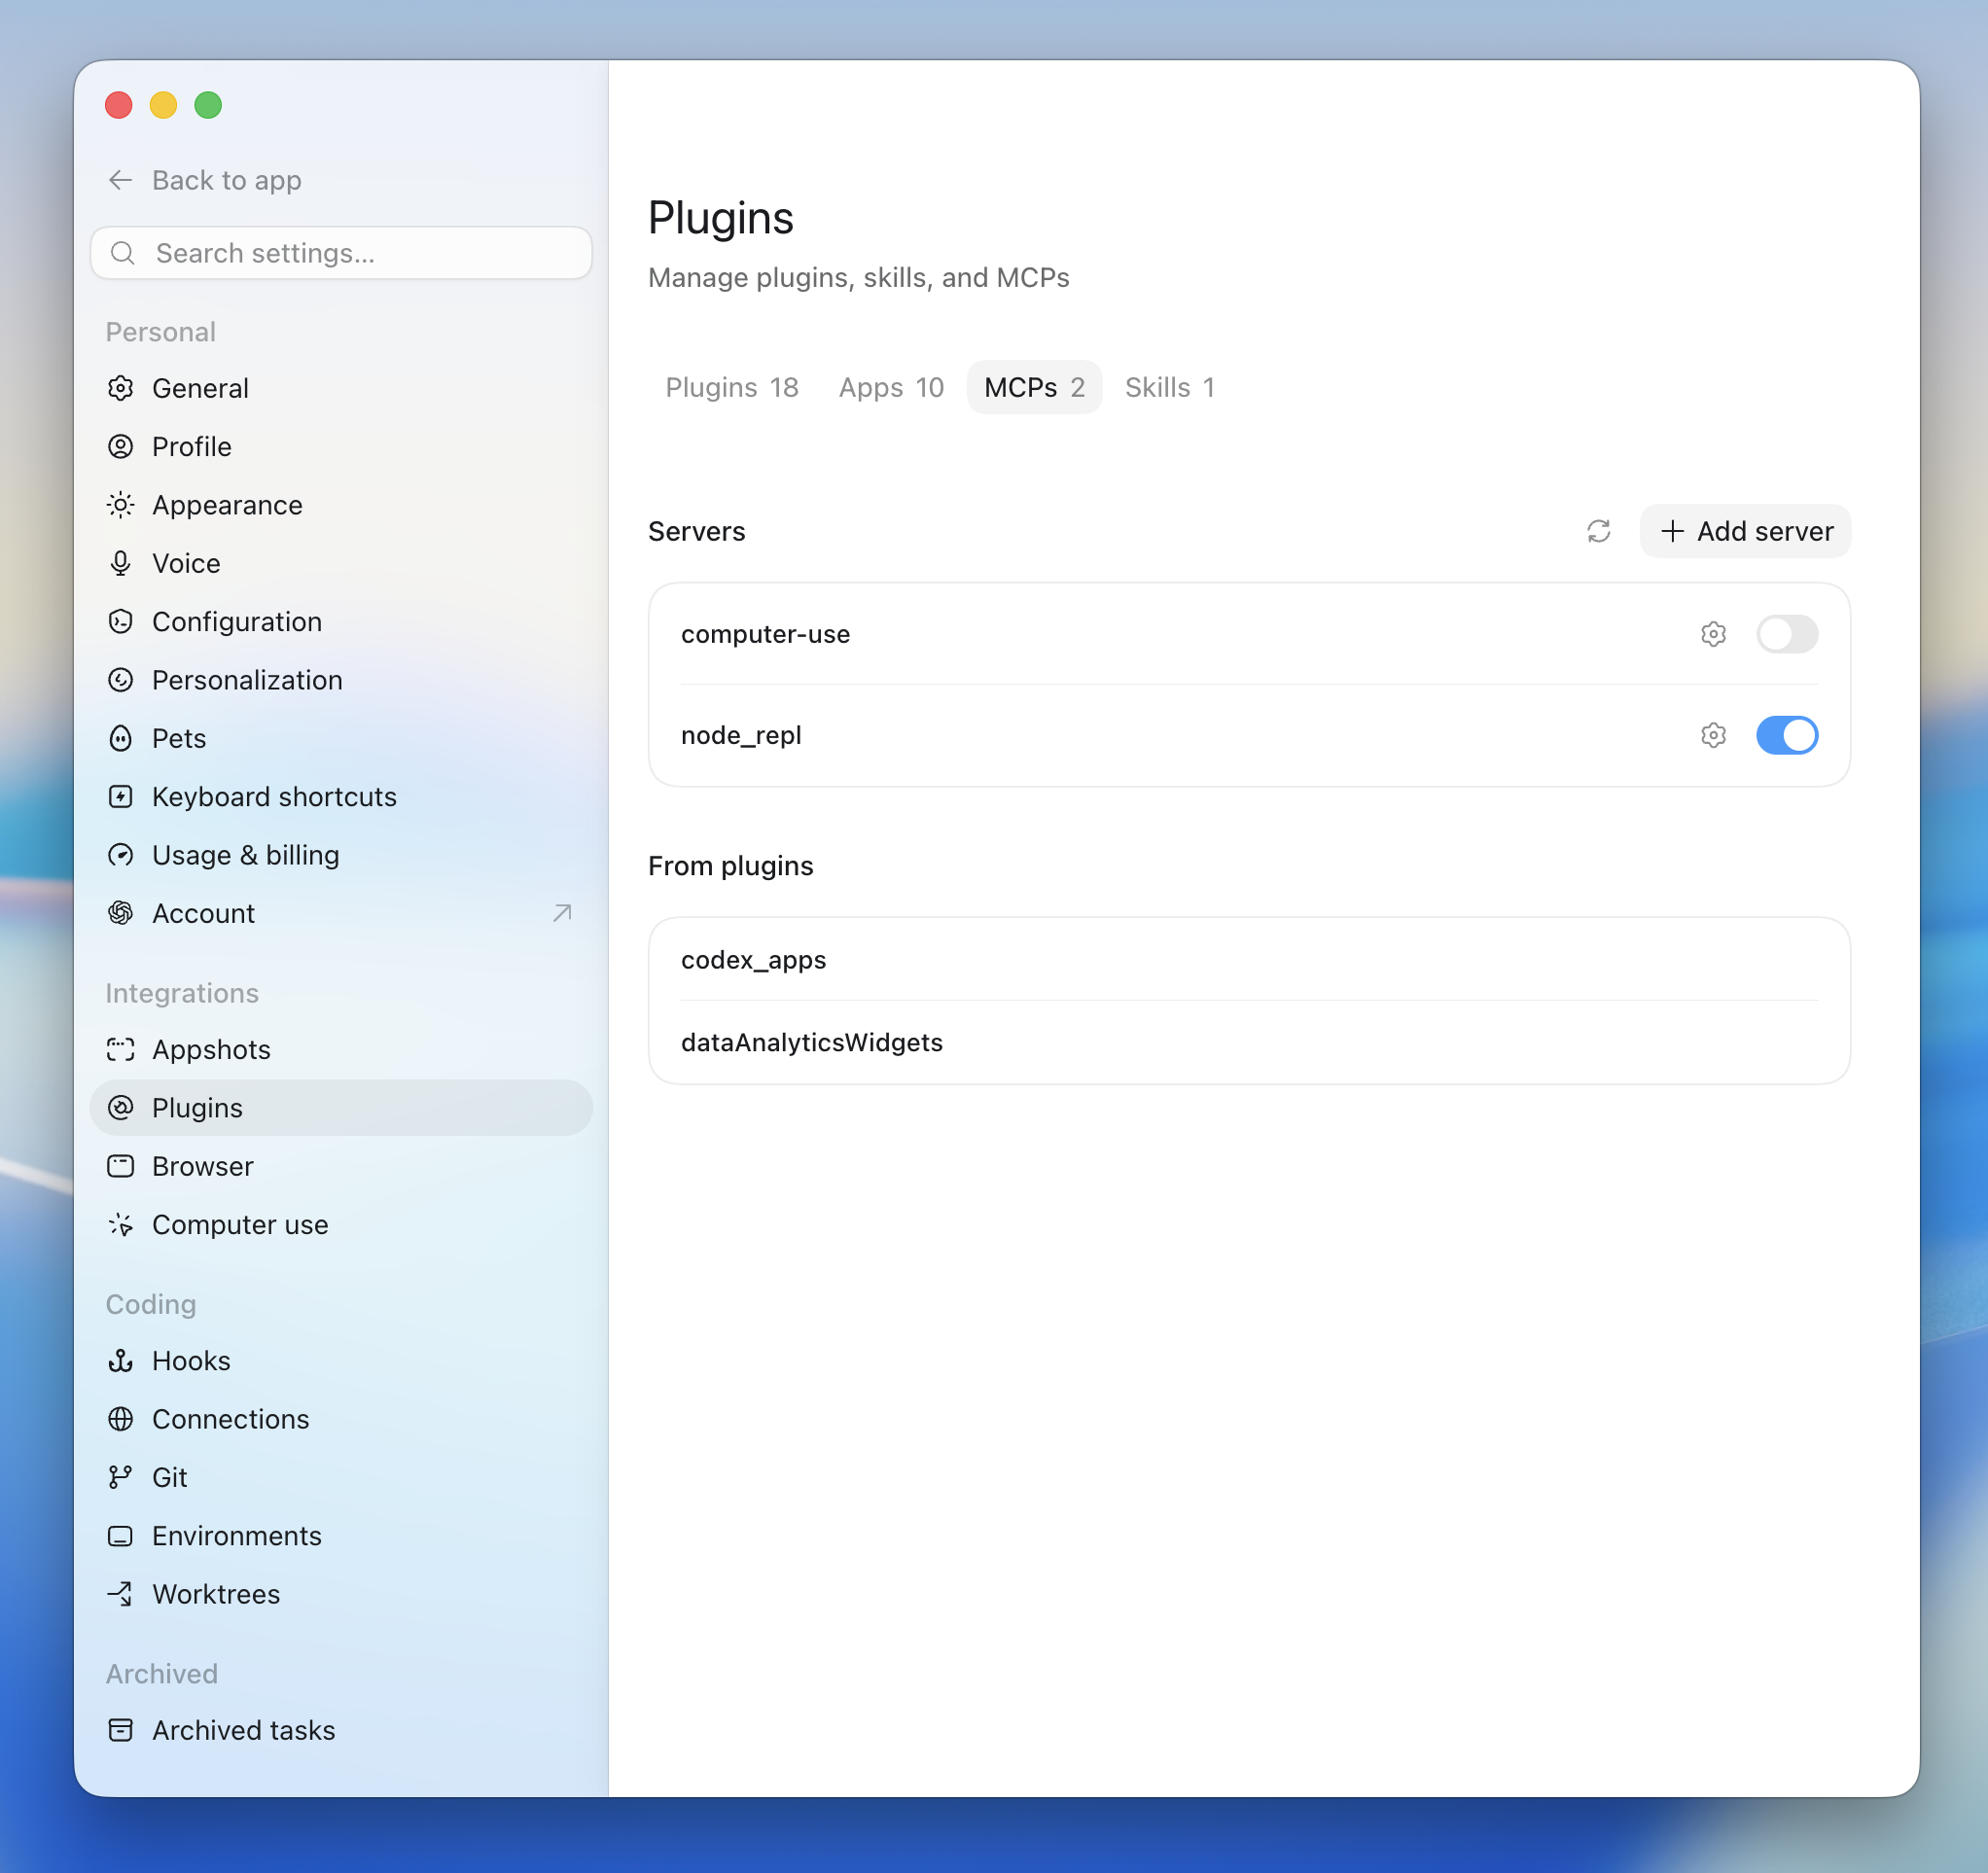
In the Codex app, open Settings → Plugins and switch to the MCPs tab. Click Add server.
Step 2: Add the Nexly server
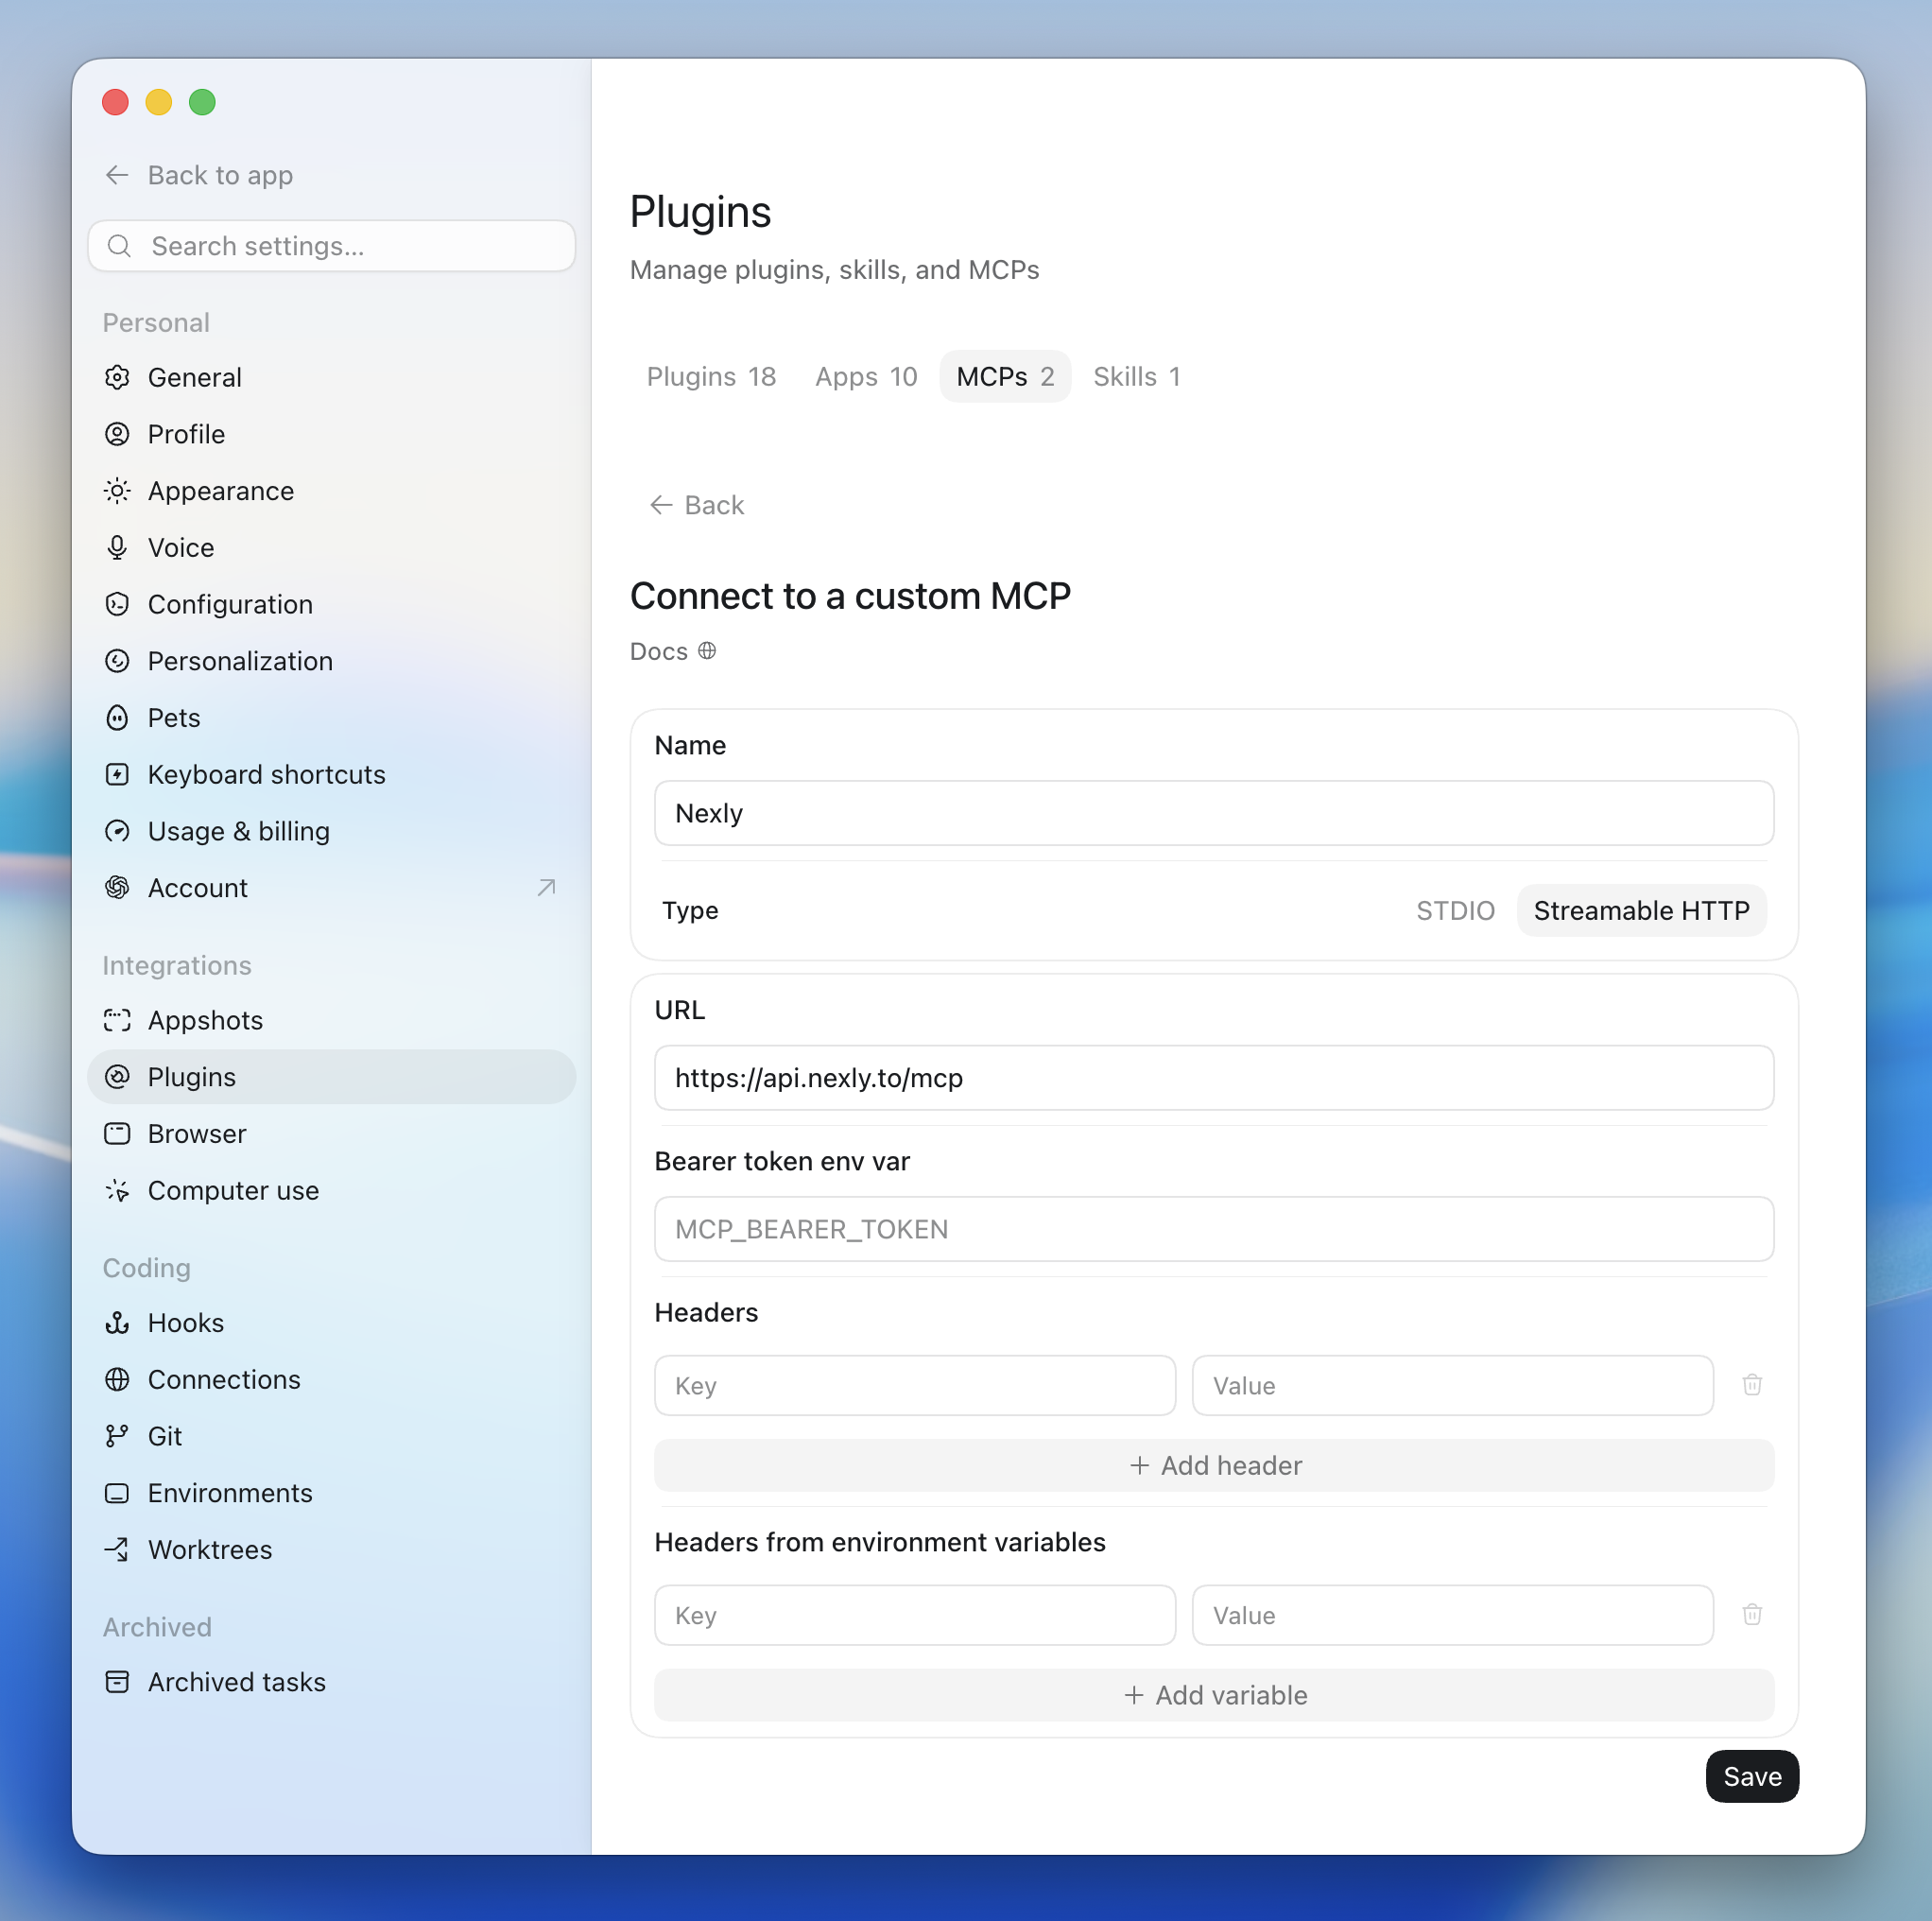
On the Connect to a custom MCP screen, fill in:
- Name: Nexly
- Type: Streamable HTTP
- URL:
https://api.nexly.to/mcp
Leave the bearer token and header fields empty — Nexly uses OAuth, not tokens. Click Save.
Step 3: Authorize Codex in Nexly
When Codex first connects to the server, it opens the Nexly authorization page in your browser. Sign in if needed, review the permissions, and click Authorize.
Prefer the terminal? Run the command below; Codex detects OAuth and opens the authorization page right away. The app and CLI read the same configuration.
codex mcp add nexly --url https://api.nexly.to/mcp
Connect Nexly to ChatGPT
ChatGPT connects custom MCP servers in developer mode on the web, on Plus, Pro, Business, Enterprise, and Edu plans.
- Open Settings → Security and login and turn on Developer mode.
- Go to Plugins, click +, and add a server with the URL
https://api.nexly.to/mcpand OAuth authentication. - Approve access on the Nexly authorization page.
ChatGPT can read your analytics and set up or manage apps, but it cannot edit your code. To install tracking in a project, use a coding agent such as Cursor, Claude Code, or Codex.
Other OAuth-capable MCP clients (for example Grok) connect the same way: give them the server URL and approve access on the Nexly authorization page.
Connect Nexly to Vaiz
The Vaiz AI chat connects to the Nexly MCP server too, so its assistant can tie traffic to your projects and turn findings into tasks. You can also add the Nexly and Vaiz MCP servers to one agent, such as Claude or Cursor. See Use Nexly and Vaiz together via MCP.
What you can ask
Once connected, the AI tool can call analytics tools: overview and time-series stats, top pages, sources, countries, devices and browsers, custom events, funnels, reports, anomalies, and AI-traffic breakdowns. Every breakdown can be narrowed to a visitor segment — a traffic source, channel, country, device, campaign, or page — the same way filters work in the dashboard.
Good examples:
- "How did traffic change on my site over the last 28 days?"
- "Which pages drive the most signups this month?"
- "Which pages do visitors from LinkedIn read over the last 12 months?"
- "Summarize the latest weekly report."
- "What is the conversion of the onboarding funnel?"
With the Vaiz MCP server connected as well, the same agent can turn these answers into tasks and documents.
Set up an app with your AI agent
Coding agents such as Cursor, Claude Code, and Codex can add your project to Nexly end to end. Open the project in the agent and ask, for example:
- "Add Nexly analytics to this project."
- "Install Nexly in this Next.js app and track signups as a custom event."
- "Our iOS app is already in Nexly — set up tracking there too."
- "Create a funnel from the pricing page to a completed signup."
Nexly gives the agent a built-in onboarding guide, so it knows the steps without extra instructions. The agent looks at your project to pick the right SDK, finds your existing app in Nexly or creates a new one, makes sure the app accepts traffic from your site, mobile app, or server, installs the SDK with your app ID and ingest key, and then checks that the first events arrive. Once events come in, the app is marked as set up in the dashboard, just like after finishing the setup wizard.
You can start the same flow from Nexly: when you create a new app, the last row of the setup card shows the MCP server address and a Setup guide with instructions for each client and a ready-to-paste prompt. The card moves on by itself once your agent has created the app and waits for its first event.
After that the agent can keep the app in shape: rename it, allow more websites, turn mobile or server tracking on or off, give custom events and data keys friendly names, rename them or approve newly discovered ones, and create or edit funnels. It can also manage the app around the data:
- Traffic filters — exclude visits by IP address or range, country, or page path, for example "stop counting visits to /admin".
- Team — list members, invite colleagues as Viewers or Editors, change a member between Viewer and Editor, remove members, and revoke pending invites.
- Public links — publish or unpublish the public dashboard and share individual reports.
What the agent can change depends on your role in the app. Editors can rename an app, manage custom events, funnels, and report links. Changing which websites, mobile apps, or servers may send data, traffic filters, the team, and the public dashboard requires the Admin role. Viewers can only read analytics, filters, and the member list.
Admin access, changes to other Admins or the app creator, and your own membership can only be managed in the dashboard.
:::tip Connected before this feature? Connections authorized earlier only have read access. To let your agent set up apps, disconnect Nexly in Settings → Connected apps and connect again, then approve the new permission. :::
Manage connected apps
Every connection you authorize appears in the Nexly dashboard under Settings → Connected apps, with the app name and its last activity.
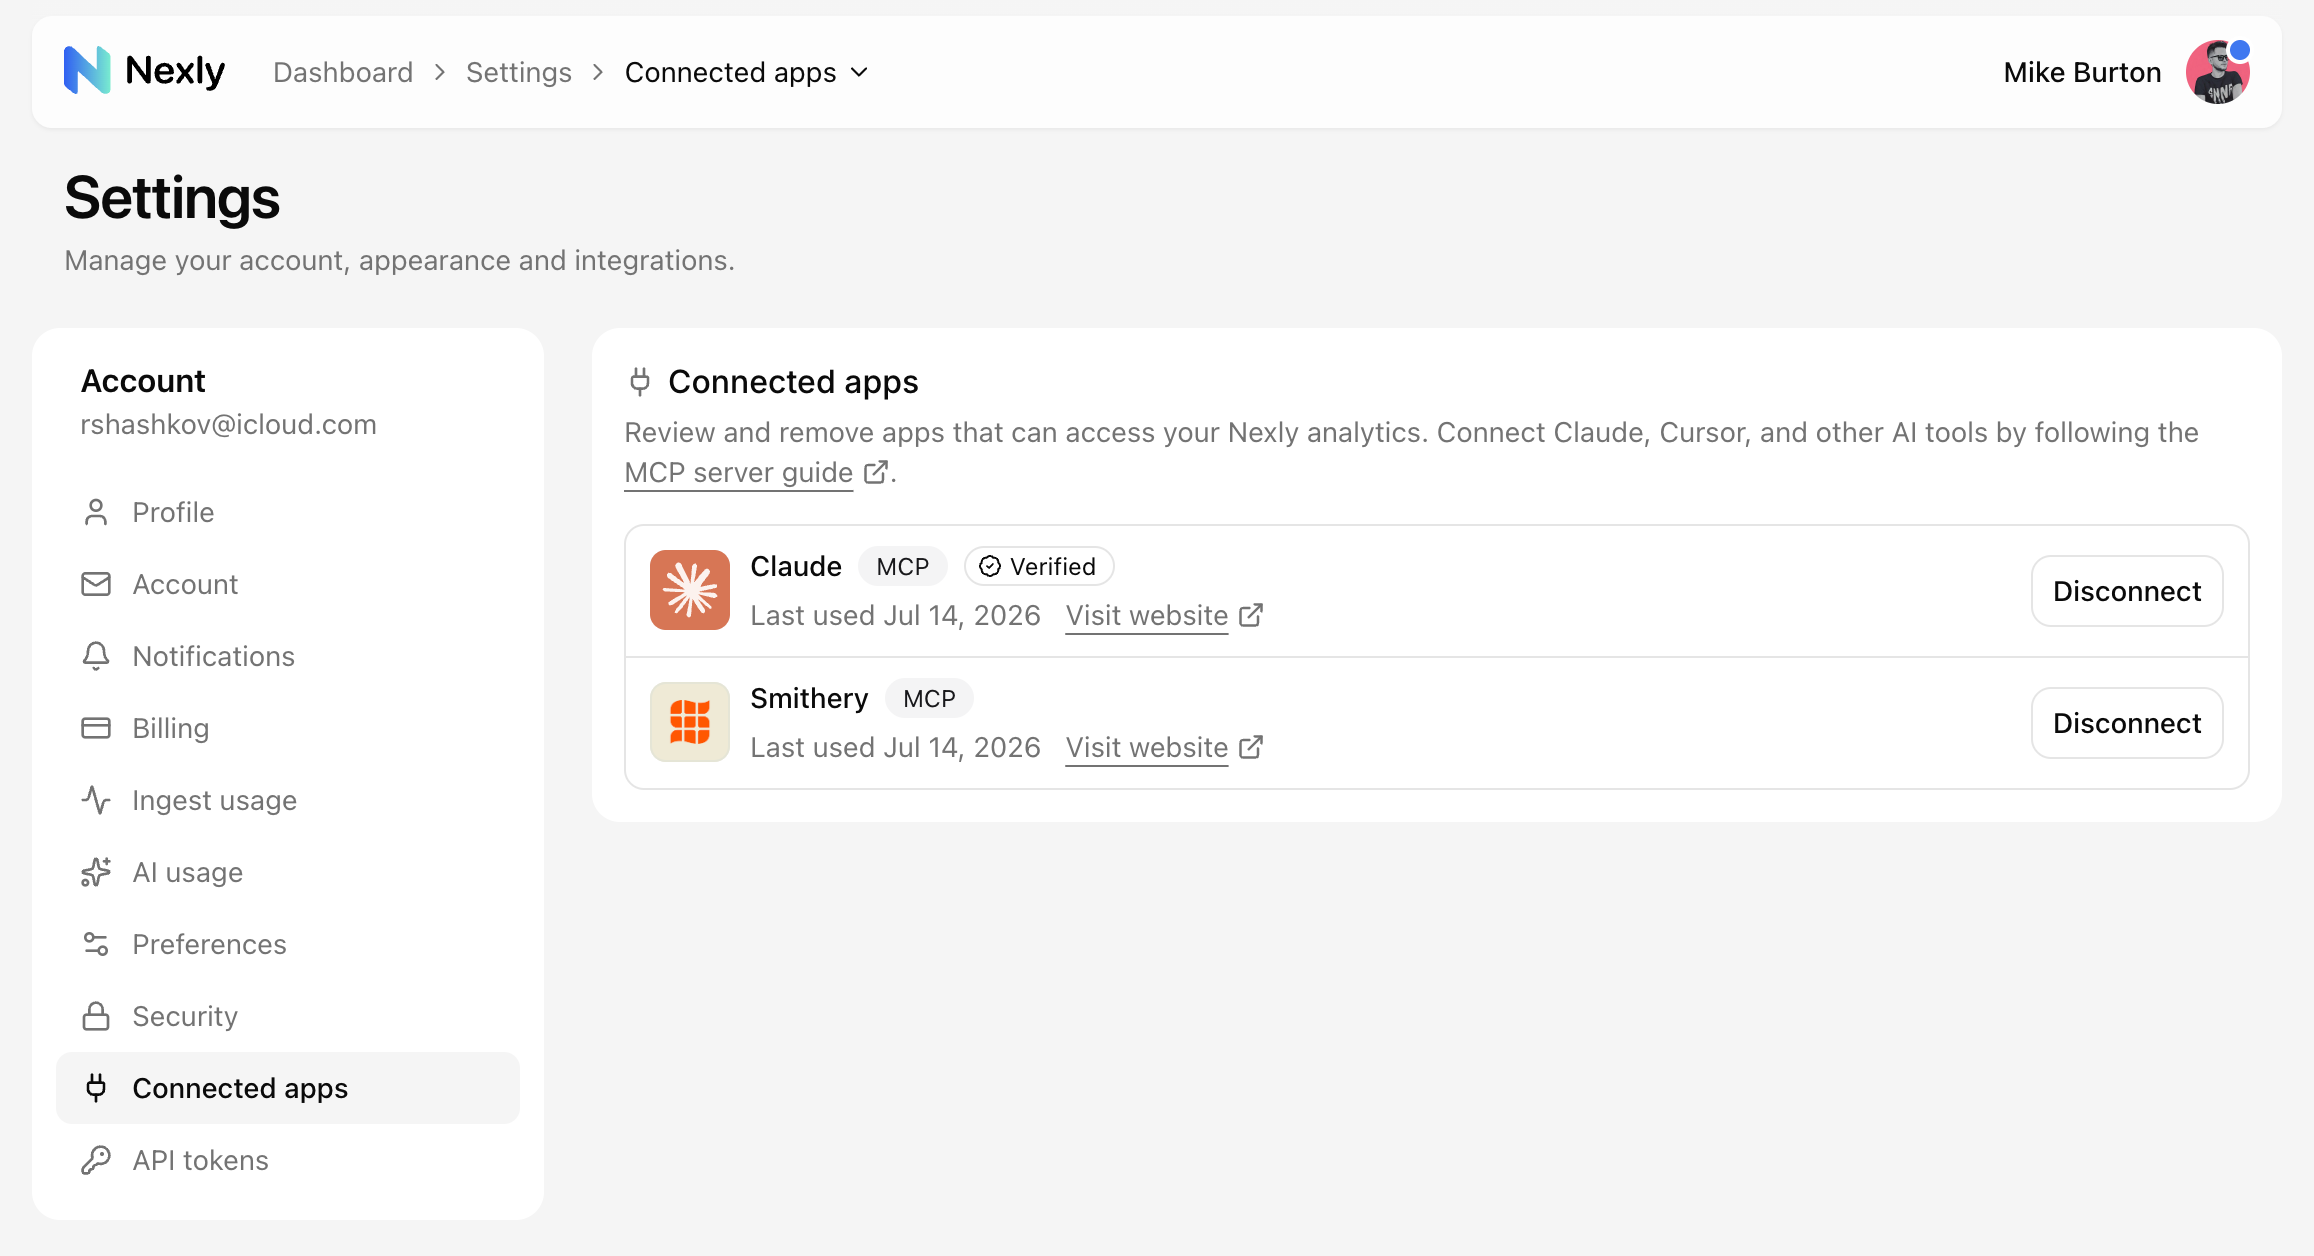
To revoke access, click Disconnect next to the app and confirm. The app loses access immediately; you can always reconnect later by authorizing again.
Security
- Authorization uses OAuth 2.1 with PKCE; credentials are never shared with the connected app.
- Access is limited to the apps available to your account and follows your role in each app.
- Connected tools cannot delete apps, rotate ingest keys, transfer ownership, grant or change Admin access, or change billing — those actions stay in the dashboard.
- Tokens are short-lived and refreshed automatically; disconnecting an app revokes all of its tokens at once.